Pallet dog house projects are DIY pet shelter builds constructed from reclaimed or new wooden shipping pallets — disassembled, cleaned, and reconstructed into weather-resistant, well-insulated, appropriately sized dog houses that provide outdoor dogs with a genuine shelter from sun, rain, wind, and cold at a fraction of the cost of commercial dog houses, using a material that is widely available for free or at minimal cost. This article gives you 15 easy pallet dog house projects specifically designed for beginners — people who own a circular saw and a drill but have not previously built a dog house — ranging from a single-afternoon flat roof build to a weekend gable roof house with insulated walls and a covered porch.
Picture a Saturday morning where you collect three heat-treated pallets from behind a garden center, spend the afternoon disassembling boards and cutting them to a simple plan, and by Sunday evening your dog has a proper timber shelter with a weatherproof roof, an insulated floor, and a door opening sized precisely to their shoulder height. Nothing purchased from a pet store. Everything built from wood that was otherwise destined for landfill. The dog does not care what it cost. You know exactly what it took. Here are 15 projects worth saving — and building.
Why Pallet Dog House Projects Work So Well for Beginners
Pallet dog house construction succeeds as a beginner woodworking project because it operates from materials and dimensions that are inherently forgiving — pallet boards are already cut to usable widths, their rough surface hides imperfect saw cuts and assembly gaps, and the dog house’s dimensional requirements (sized to the specific dog) are more lenient than any furniture or cabinetry project where millimeter precision determines the outcome. The design philosophy draws from the global maker movement’s reclamation of waste materials as construction resources — shipping pallets are specifically designed to carry heavy loads, which means their timber is structurally sound far beyond what any equivalent purchased lumber provides for its cross-section.
The materials that make pallet dog houses both buildable and appropriate for dog occupancy are honest and practical: the heat-treated pine of pallet boards (stamped HT on the pallet stringer board) is free of the chemical treatments that make methyl bromide-treated pallets (stamped MB) unsafe for animal housing, and its structural integrity handles the specific loads of a dog house — snow load on the roof, wind lateral load on the walls, and the impact load of a dog jumping in and out — with genuine reliability. Exterior wood screws, construction adhesive, corrugated metal or asphalt shingle roofing, and pet-safe exterior wood stain are the only additional materials most builds require.
The pallet dog house building tradition has produced an extensive body of documented project plans, video tutorials, and community support online, making it one of the most supported beginner woodworking categories available. Beginners benefit from this documentation density — virtually every structural challenge, every waterproofing question, and every sizing calculation has been addressed by experienced builders in accessible online communities, reducing the research burden that makes other beginner woodworking projects more intimidating.
Even the most basic pallet dog house — a simple three-wall shelter with a lean-to roof — provides the specific shelter qualities that outdoor dogs genuinely need: wind break, rain protection, and an elevated floor surface that separates the dog from cold, wet ground. Every additional feature (insulation, proper gable roof, covered porch, windows) improves on this baseline, and the 15 projects below represent the full spectrum from baseline to comprehensively featured.
Before You Begin — Critical Safety Check
Always verify pallet treatment before use. Every pallet carries a stamp on its stringer board indicating its treatment method. HT (heat treated) pallets are safe for all construction projects including animal housing. MB (methyl bromide) pallets are chemically treated and must never be used for dog houses, garden beds, or any food or animal contact application. DB (debarked) and KD (kiln dried) stamps are both safe alternatives. Unstamped pallets of unknown origin should be avoided. This single verification step is the most important safety action in any pallet building project.
Build at a Glance
| Element | Trait 1 | Trait 2 |
|---|---|---|
| Philosophy | Waste material reclamation as genuine structural resource — pallet timber built for heavy load exceeds most dog house requirements | Beginner-appropriate complexity — forgiving materials, simple geometry, dimensional tolerance |
| Materials | HT-stamped pallet boards, exterior screws, construction adhesive, corrugated metal or asphalt shingle | Pet-safe exterior stain, weatherproof sealant, rigid foam insulation board, joist hanger hardware |
| Tools Required | Circular saw or reciprocating saw, cordless drill, tape measure, square, pry bar for disassembly |
1. Simple Flat Roof Pallet Shelter (One Afternoon)
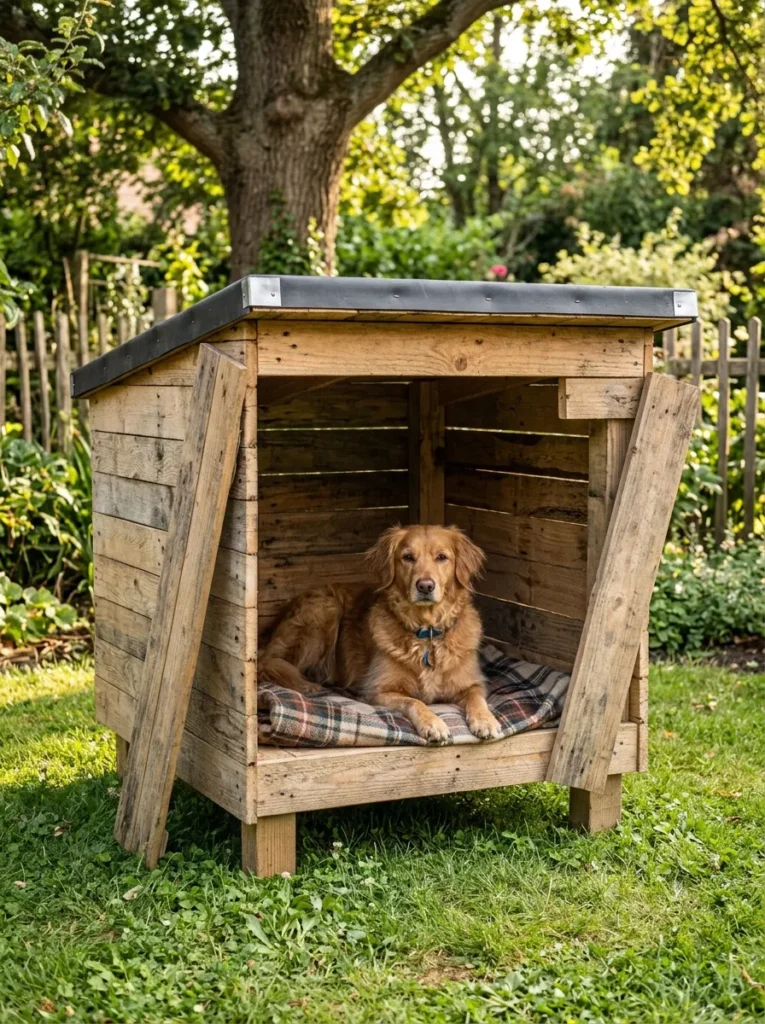
Vibe: Practical and warm — the shelter that takes one afternoon and immediately improves a dog’s outdoor life.
Why it works: A flat roof three-sided shelter is the beginner project that teaches the three fundamental skills of pallet dog house construction — pallet disassembly (using a pry bar and hammer to separate boards from stringers without splitting), simple frame construction (building a rectangular box frame from dimensional lumber before attaching pallet boards as cladding), and weatherproof roofing (applying rubber membrane or corrugated metal to a simple flat or near-flat roof plane). The three-sided configuration eliminates the door framing complexity of a fully enclosed dog house and produces a shelter that most dogs use readily because the open front removes the enclosed entry that some dogs are initially reluctant to enter. The slight rear slope (5–10cm higher at the front than the rear) is the critical drainage modification that prevents water ponding on the flat roof.
How to get it: Disassemble two pallets into individual boards. Build a simple rectangular frame from 2×4 lumber — two side frames (each 60cm wide and 90cm tall) and a back frame of matching height. Clad the frames with pallet boards attached horizontally using exterior screws, with 5mm gaps between boards for ventilation. Build the floor platform from pallet boards on four short 10cm timber leg blocks. Build the roof from pallet boards with a slight slope, covered in a single piece of EPDM rubber roofing membrane stapled and adhesive-sealed at the edges.
Quick Win: A full unmodified pallet placed flat and raised on four concrete blocks at each corner corner makes an immediately usable elevated floor platform for any dog shelter — the pallet’s built-in structural strength handles a large dog’s weight without any additional framing, and its slatted surface provides drainage and ventilation that a solid plywood floor cannot.
| Product |
|---|
| EPDM rubber roofing membrane roll |
| Exterior screw set 3 inch stainless |
| 2×4 lumber for frame construction |
| Construction adhesive waterproof |
| Pry bar for pallet disassembly |
Also view: 14 Modern Garage Dog Room Ideas with Smart Storage
2. Classic Gable Roof Pallet Dog House (Weekend Build)
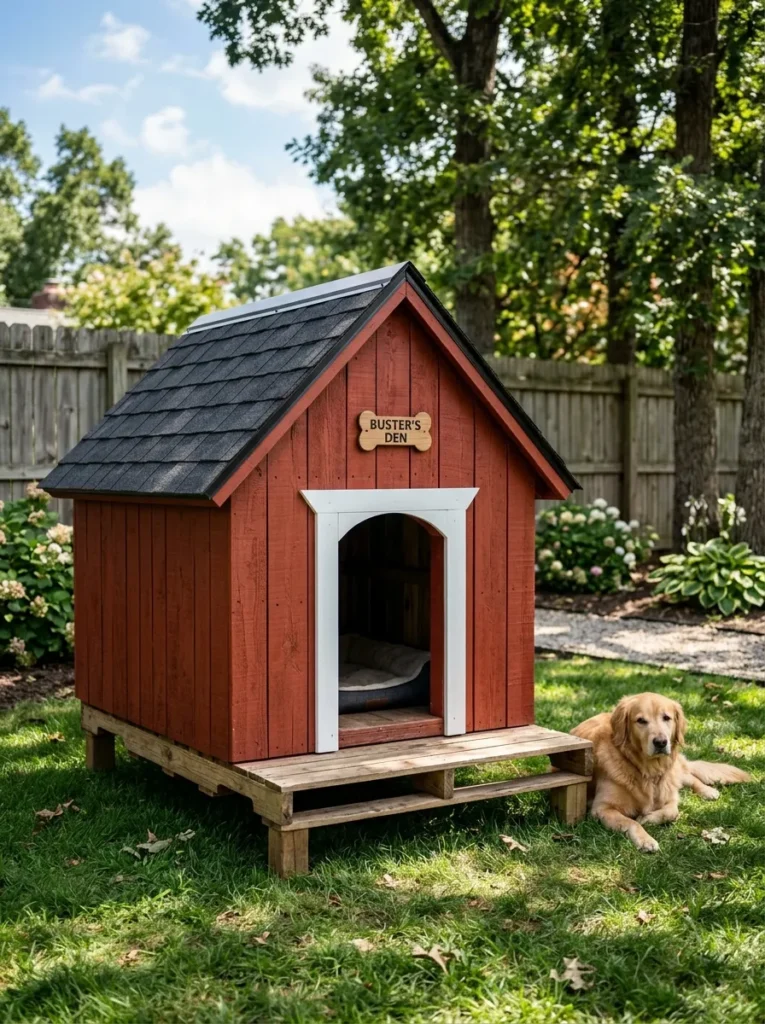
Vibe: Classic and solid — the dog house that looks like it was part of the backyard’s original design.
Why it works: The classic gable roof dog house is the most structurally sound and weather-resistant configuration available in beginner pallet construction because the symmetrical triangular roof geometry distributes rain and snow load evenly to both side walls and eliminates the ponding risk of flat or low-slope roofs. The gable roof also creates a peaked interior space that is significantly warmer than flat roof alternatives — the air pocket in the peak acts as an insulating thermal buffer between the exterior roof surface and the dog’s sleeping area. The centered door opening and full four-wall enclosure provide maximum wind protection and thermal retention for cold climates where open-front shelters would be insufficient.
How to get it: Size the house to the dog using the standard formula: interior length = dog body length (nose to tail base) x 1.25; interior width = dog body length x 1.0; door height = dog shoulder height x 1.5; interior height at ridge = dog shoulder height x 1.75. Frame four walls from 2×4 lumber at the calculated dimensions, then clad with horizontal pallet boards. Build two identical gable end frames using 2×4 rafter pairs at a 45-degree pitch. Lay OSB sheeting over the rafters and cover with standard asphalt shingles using roofing nails. Paint all exterior surfaces with exterior-grade paint in the chosen color.
| Product |
|---|
| Asphalt shingle pack black |
| OSB sheet 12mm for roof sheathing |
| 2×4 lumber set for wall framing |
| Exterior paint and primer set |
| Roofing nail set galvanized |
3. Pallet Dog House with Covered Front Porch
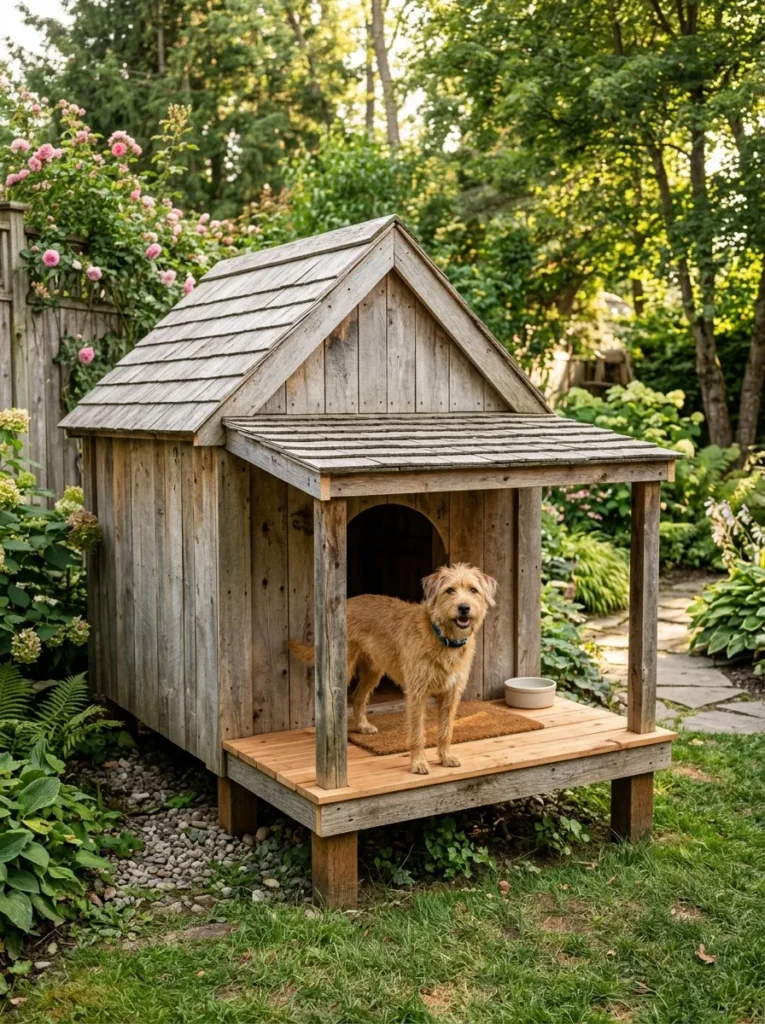
Vibe: Welcoming and considered — the dog house with an outdoor room that the dog uses as much as the indoor space.
Why it works: A covered front porch extension transforms a basic enclosed dog house into a two-zone outdoor structure — the fully enclosed sleeping area for cold and wet conditions, and the covered porch for the warm, partially shaded outdoor resting that dogs prefer during mild weather. Dogs consistently use covered porch structures as their primary resting position during daylight hours rather than the fully enclosed interior, which means the porch addition dramatically increases the structure’s behavioral value to the dog by providing the temperature-regulated, weather-protected outdoor observation position that dogs naturally seek. The structural logic of the porch is simple: extend the front roof plane beyond the front wall by 60–90cm and support the extended roof section with two short vertical posts at the porch front corners.
How to get it: Build the main house section first using the standard gable roof construction. After completing the main structure, extend the front wall’s top plate forward by 60–90cm on both sides using additional 2×4 lumber, and continue the roof rafters forward over this extended plate to form the porch roof slope. Install two vertical 2×4 or 4×4 posts at the front porch corners to support the extended roof edge. Lay cedar or treated pine decking boards on the porch floor section, leaving 5mm gaps for drainage. The porch roof and main roof should be continuous — the same roofing material applied without any junction break between them.
| Product |
|---|
| Cedar decking boards for porch floor |
| 4×4 post set for porch corner support |
| Joist hanger set for porch framing |
| Post anchor base for porch posts |
| Porch roof extension rafter set 2×4 |
4. Insulated Pallet Dog House for Cold Climates
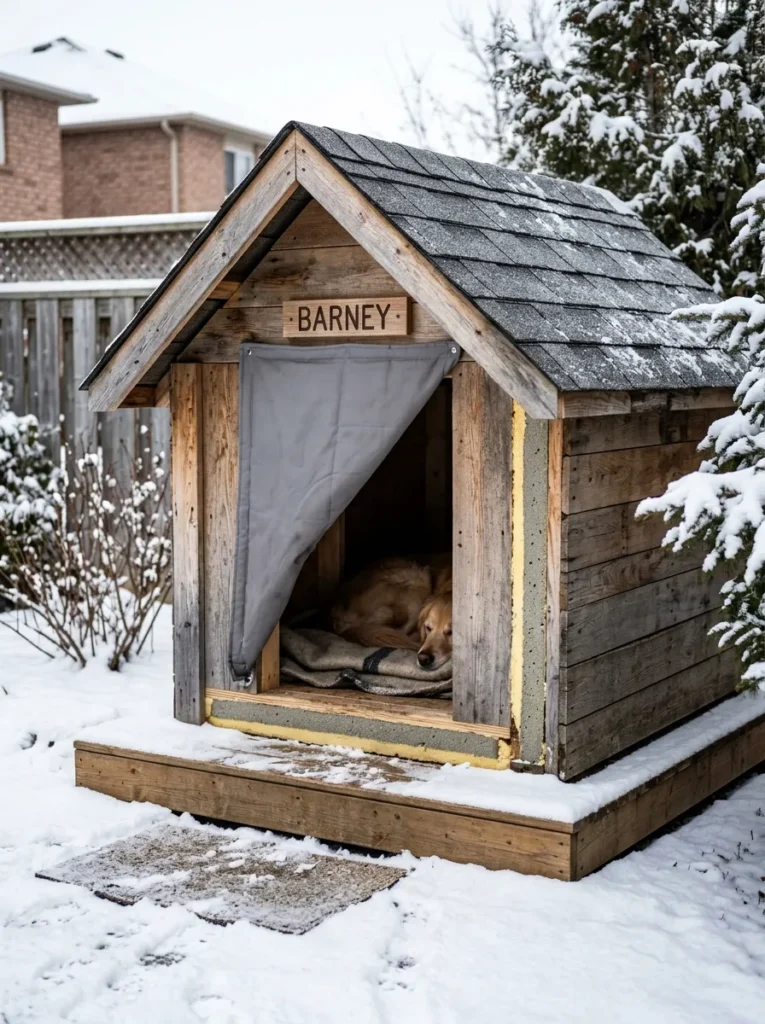
Vibe: Solid and weatherproof — the dog house that makes a winter night genuinely comfortable rather than simply survivable.
Why it works: A double-wall insulated pallet dog house applies the building science principle of thermal envelope integrity — the combination of an outer pallet board cladding layer, an air gap or rigid foam insulation layer, and an inner pallet board layer creates a wall assembly whose thermal resistance (R-value) is genuinely capable of maintaining a significantly warmer interior temperature than the exterior in cold conditions. For a 25kg dog generating approximately 200 watts of metabolic heat, a well-insulated 1m² interior space can remain 10–15°C warmer than the exterior ambient temperature in calm conditions — the difference between a dangerous environment and a genuinely comfortable one during cold nights. The insulated door flap is the specific addition that eliminates the greatest source of heat loss — the uninsulated door opening through which warm interior air escapes and cold exterior air enters.
How to get it: Build wall frames as double frames — an outer frame clad with pallet boards and an inner frame clad with pallet boards, with a 50mm cavity between them filled with rigid foam insulation board cut to fill each stud bay. Insulate the floor platform by placing 50mm rigid foam boards between the floor joists before laying the final floor surface. Insulate the roof by placing foam boards between the rafters. Hang a vinyl flap or heavy canvas flap in the door opening using a small piece of lumber as the top mounting rail — the flap provides a weatherproof closure while remaining passable for the dog.
| Product |
|---|
| Rigid foam insulation board 50mm set |
| Vinyl door flap set for dog house |
| Foam board adhesive construction |
| R-value tape for insulation seams |
| Expanded polystyrene sheet for floor |
5. Elevated Pallet Dog House on Legs
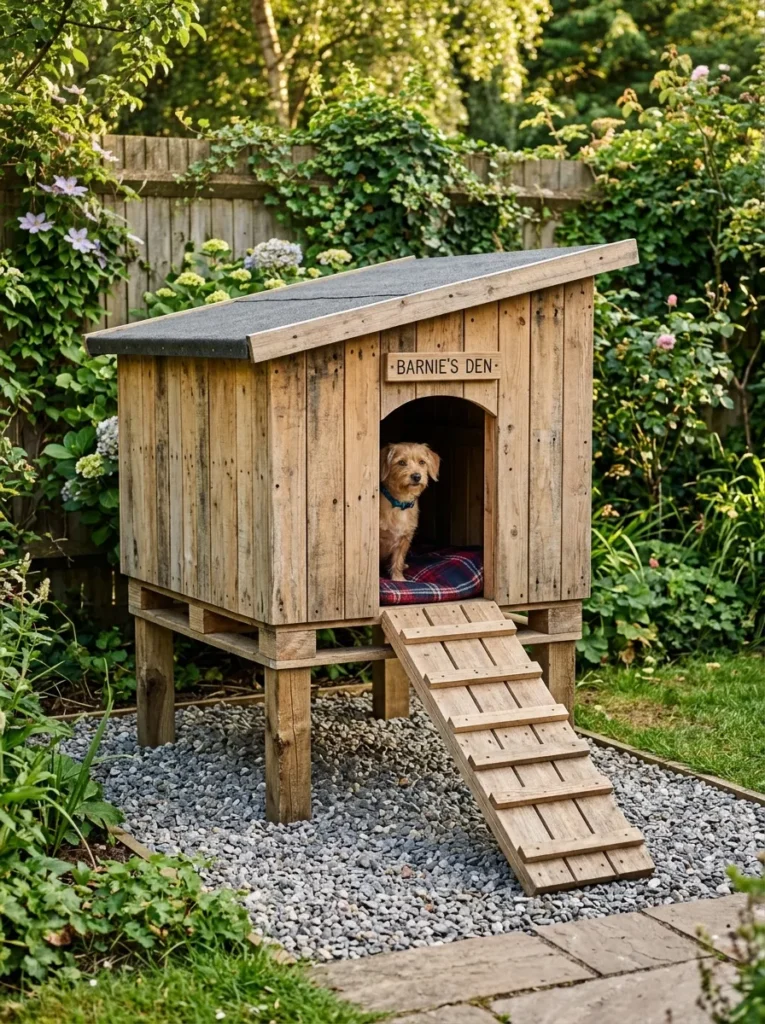
Vibe: Practical and considered — the elevated house that stays dry underneath regardless of how much rain falls.
Why it works: Elevating a dog house on timber legs applies the fundamental moisture management principle of separation from ground contact — ground-contact wood in a wet environment is the primary source of rot, mold, and structural deterioration in any outdoor timber structure. Lifting the house 25–35cm off the ground eliminates direct ground moisture contact, allows air circulation beneath the floor that prevents the underfloor moisture accumulation that would otherwise occur, and provides the thermal separation from cold ground that significantly improves interior warmth in winter. The integrated ramp is the accessibility detail that makes the elevated house practical — a steep step-up entry discourages use and risks joint strain in older dogs, while a gentle ramp at a maximum 20-degree angle is comfortable for all ages and breeds.
How to get it: Build four leg assemblies from 4×4 timber posts at 30cm height, each set in post anchor brackets screwed to the house floor frame rather than set in concrete — the bracket attachment allows the house to be repositioned without disturbing the ground. Set each leg on an individual concrete paver or flagstone for load distribution. Build the ramp from two side rails and cross-slat rungs spaced 10cm apart — the cross-slats provide grip that a smooth ramp surface cannot. Angle the ramp at 15–20 degrees and attach to the house front wall at the door opening level using a piano hinge that allows the ramp to be raised against the house for storage or transport.
| Product |
|---|
| 4×4 post set for leg construction |
| Post anchor bracket set deck screw |
| Concrete paver set for leg footings |
| Piano hinge set for ramp attachment |
| Cross-slat timber set for ramp grip |
6. Duplex Pallet Dog House for Two Dogs
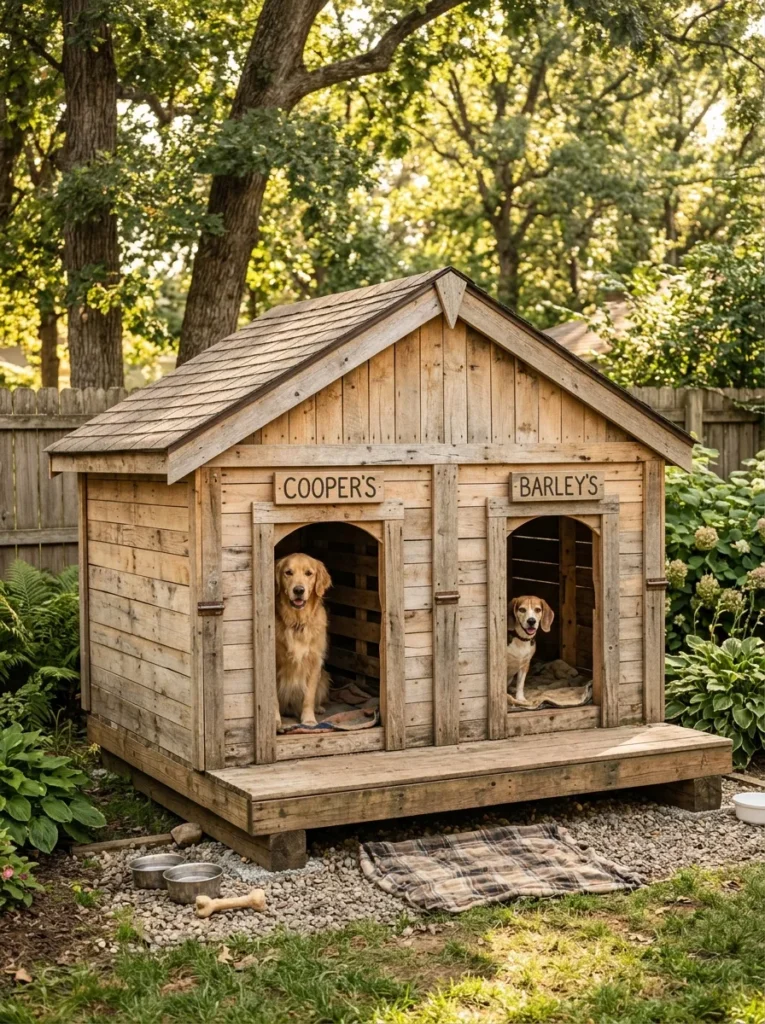
Vibe: Practical and generous — the dog house that accommodates the social and the antisocial dog in the same structure.
Why it works: A duplex dog house applies the spatial principle of shared structure with individual territory — two dogs sharing one large open dog house frequently compete for the prime sleeping position (furthest from the door, most sheltered from drafts), creating social tension that reduces the quality of rest for both. A duplex with an internal dividing wall and two separate door openings gives each dog their own defined territory while sharing the structural and material efficiency of a single large build. The internal dividing wall is the critical element — without it, the duplex is simply a large dog house; with it, it becomes two individually defensible spaces that reduce territorial competition and allow both dogs to rest without social monitoring.
How to get it: Size the duplex to twice the standard single-dog house width for the specific breed — if each dog requires a 90cm interior width, the duplex is 180cm wide plus the dividing wall thickness. Frame the structure as a single large rectangle and install a central dividing wall from floor to roof height using 2×4 lumber framing clad with pallet boards. Position two door openings symmetrically in the front wall, each centered on its respective half of the structure. Build the gable roof to span the full width, using a single ridge beam and symmetrical rafters.
| Product |
|---|
| 2×4 lumber set for duplex frame |
| Pallet board set for extended cladding |
| Ridge beam lumber for extended roof |
| Gable rafter set extended span |
| Door opening trim set for two entries |
7. Pallet Dog House with Side Window
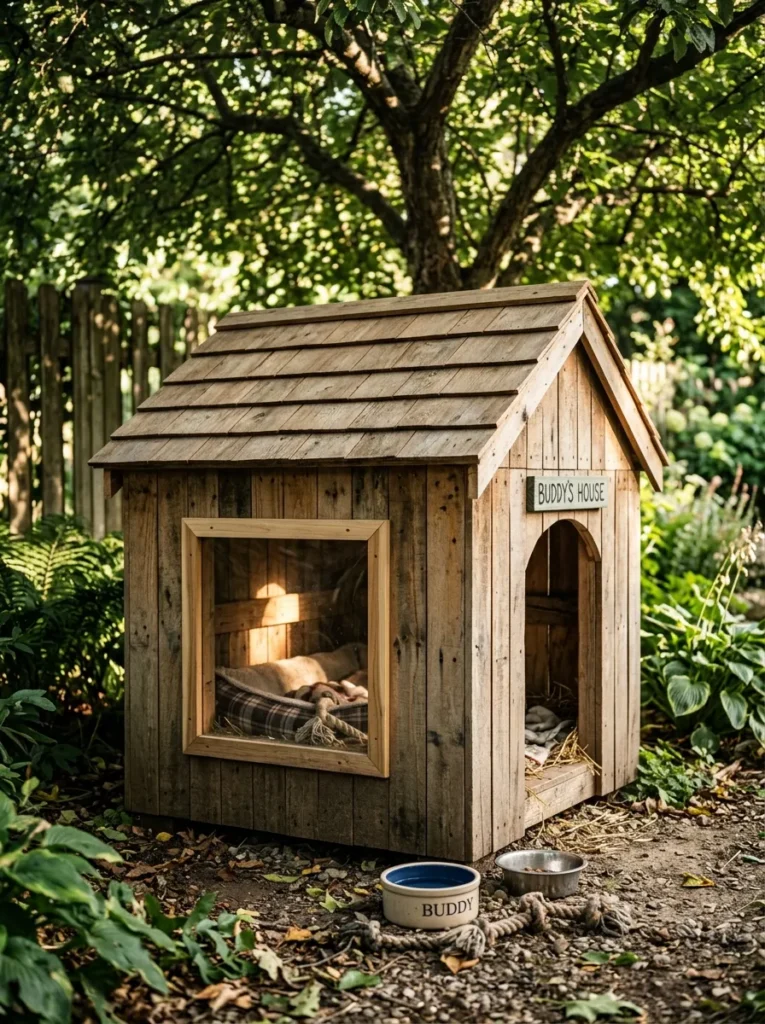
Vibe: Charming and practical — the dog house whose window lets the dog keep watch without going outside.
Why it works: A side window in a dog house applies the behavioral principle of environmental monitoring without exposure — dogs are highly motivated to observe their territory, and a dog house without visual access to the outside frequently results in the dog preferring to rest outside the house where sightlines are available rather than inside where they cannot see approaching stimuli. A small window positioned in the side wall allows the dog to remain in the warmth and shelter of the house interior while maintaining visual contact with the yard, which dramatically increases the frequency of voluntary house use in dogs who prefer outdoor observation positions. Clear polycarbonate sheeting is the ideal window material for this application — it is shatterproof, UV-stable, lightweight, and easy to cut with a standard saw.
How to get it: Plan the window location in the side wall during framing before pallet board cladding is applied — frame the opening with doubled 2×4 lumber on all four sides (a rough opening box) at a height that aligns with the dog’s eye level when inside the house (approximately 40cm from the floor for most medium dogs). Cut a piece of 4mm clear polycarbonate sheeting to the rough opening dimensions plus 20mm on each side for overlap. Secure the polycarbonate with stainless screws through pre-drilled clearance holes at 20cm intervals around the perimeter, with a plastic or timber trim board covering the polycarbonate edge and screw heads.
| Product |
|---|
| Clear polycarbonate sheet 4mm |
| Polycarbonate screw set with washer |
| 2×4 lumber window rough opening frame |
| Timber window trim set |
| Saw for polycarbonate cutting |
8. Painted Pallet Dog House with Fence Match
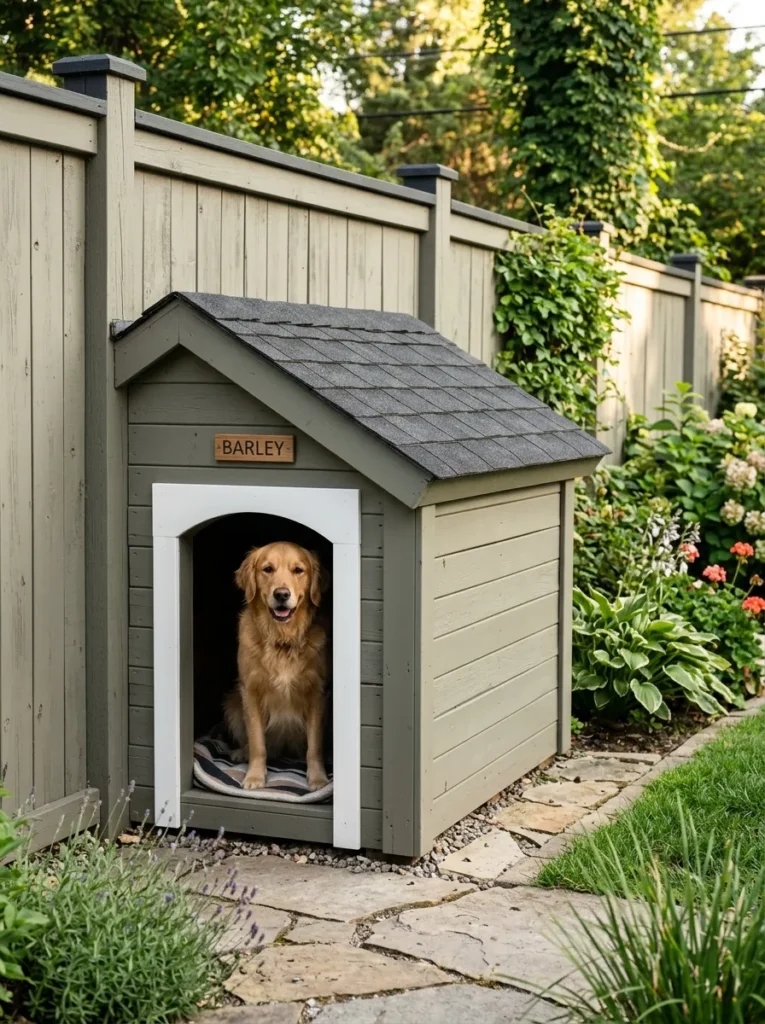
Vibe: Considered and coordinated — the dog house that looks like it was planned into the property’s design from the beginning.
Why it works: Painting a pallet dog house to match the property’s existing fence or outbuildings applies the design principle of material continuity as perceived integration — when the dog house shares the fence’s color, finish, and trim treatment, it reads as an element of the property’s architectural vocabulary rather than an addition to it. This is the design decision that most immediately elevates a pallet dog house from a functional DIY build to something that contributes positively to the property’s aesthetic rather than being visually accommodated as a necessary compromise. The practical benefit of painting extends beyond aesthetics — a quality exterior paint over the pallet board surface seals the timber against moisture, UV degradation, and biological growth, extending the structure’s usable life from 3–5 years to 8–15 years depending on paint quality and application thoroughness.
How to get it: Identify the fence paint color by either taking a chip to a paint supplier for color matching, or finding the original paint product information from the fence installation records. Apply a wood primer compatible with the pallet board’s surface condition (sanded smooth for clean adhesion) before the color coat. Apply two full color coats by brush rather than roller — brush application penetrates the timber grain more thoroughly than roller application and provides better long-term adhesion on rough-sawn pallet board surfaces. Apply a contrasting white or light neutral to the door opening frame trim using a small brush for clean edge definition.
| Product |
|---|
| Exterior wood primer gray base |
| Exterior paint color-matched to fence |
| Small brush set for trim painting |
| Sandpaper set 80 and 120 grit prep |
| White exterior paint for door trim |
9. Pallet Dog House with Green Sedum Roof
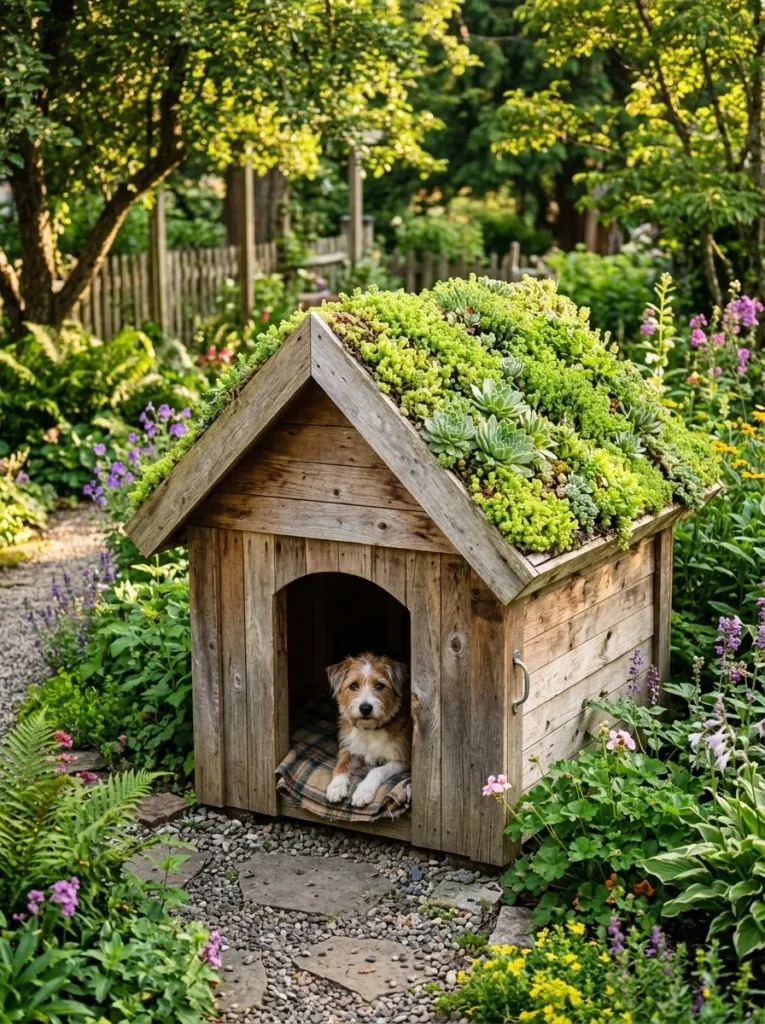
Vibe: Natural and considered — the dog house that belongs in the garden because it is growing with it.
Why it works: A living sedum roof on a pallet dog house applies the green roof principle to pet shelter construction — sedum (a drought-tolerant succulent family) and mixed alpine plants establish quickly on a thin substrate layer over a waterproof membrane and provide natural insulation (an established sedum mat adds approximately R-2 insulation value to the roof assembly), excellent sound attenuation, and the visual quality of a garden feature rather than a construction element. The sedum roof is also the most low-maintenance roofing option over a 10-year period — once established (typically 12–18 months after planting), sedum requires no watering, no feeding, and no pruning in most temperate climates. The additional structural loading of a sedum roof (approximately 60–80 kg/m² when fully established) requires a slightly more robust roof frame than a standard shingle roof — double rafter spacing at 300mm centers rather than 600mm centers.
How to get it: Build the roof frame at double rafter density (rafters at 300mm centers) to handle the sedum loading. Apply a root-resistant waterproof membrane (EPDM or TPO) over the roof sheathing, extending 30mm up the gable end walls. Install a drainage mat over the membrane, followed by a sedum growing substrate to 75mm depth. Install a perimeter edge trim to retain the substrate and plant a pre-grown sedum mat cut to size — these are available from green roof suppliers as roll-on living mats that establish within a single growing season. Install a lightweight polypropylene perimeter grid to prevent substrate displacement during heavy rain before the sedum root system establishes.
| Product |
|---|
| EPDM root-resistant waterproof membrane |
| Sedum mat pre-grown living roof |
| Green roof drainage mat layer |
| Green roof growing substrate bag |
| Perimeter edge trim green roof |
10. Mini Farmhouse Pallet Dog House
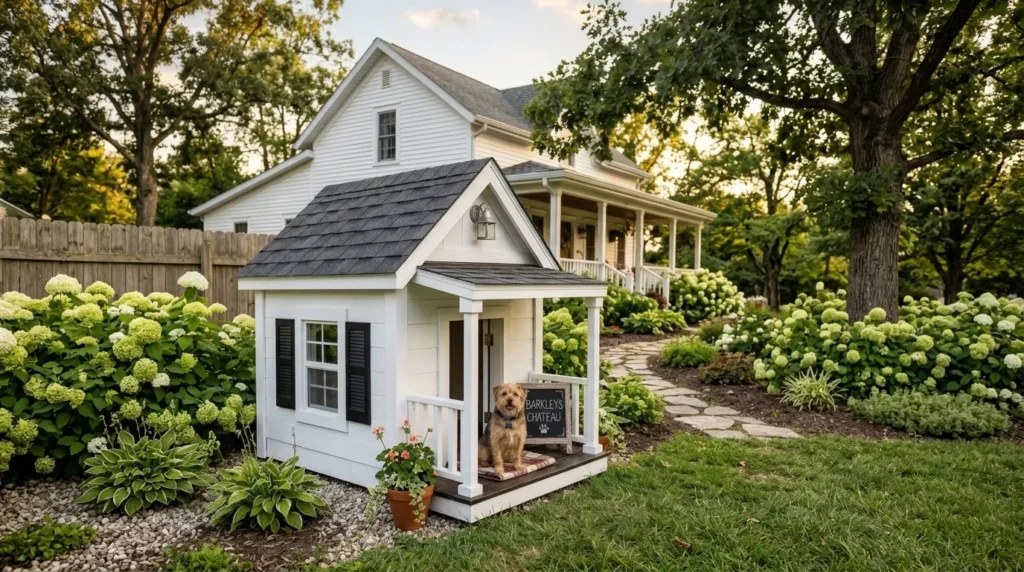
Vibe: Charming and whimsical — the dog house that makes visitors stop and smile and ask who the architect was.
Why it works: A mini farmhouse pallet dog house applies the design principle of proportional architectural reference — by replicating the specific elements of farmhouse architecture at a reduced scale (the white clapboard exterior, the covered porch with posts and railing, the shuttered windows, the dark shingle roof), the dog house reads as a miniature residential structure rather than a pet product, creating the charming quality that makes it a garden feature as much as a functional animal shelter. The chalkboard sign with the dog’s name is the personalization detail that most directly communicates the relationship between the builder and the dog — it transforms a construction project into a made-with-care object whose specific recipient is identified by name.
How to get it: Build the base house structure following the standard gable roof construction, then add the farmhouse architectural details as a secondary phase. Cut shutter shapes from pallet boards — simple rectangular panels approximately 10cm wide and the window height tall — and paint black before mounting with screws to each side of the window opening. Build the porch railing from dowel rods between two top and bottom rails, spacing dowels at 5cm intervals. Letter the chalkboard sign with chalk marker directly on a small piece of chalkboard-painted timber, or use a small purchased chalkboard from a craft store.
| Product |
|---|
| Chalkboard paint small tin |
| Dowel rod set for porch railing |
| Black exterior paint for shutters |
| Small potted plant for porch display |
| White chalk marker for sign lettering |
11. Off-Grid Solar-Lit Pallet Dog House
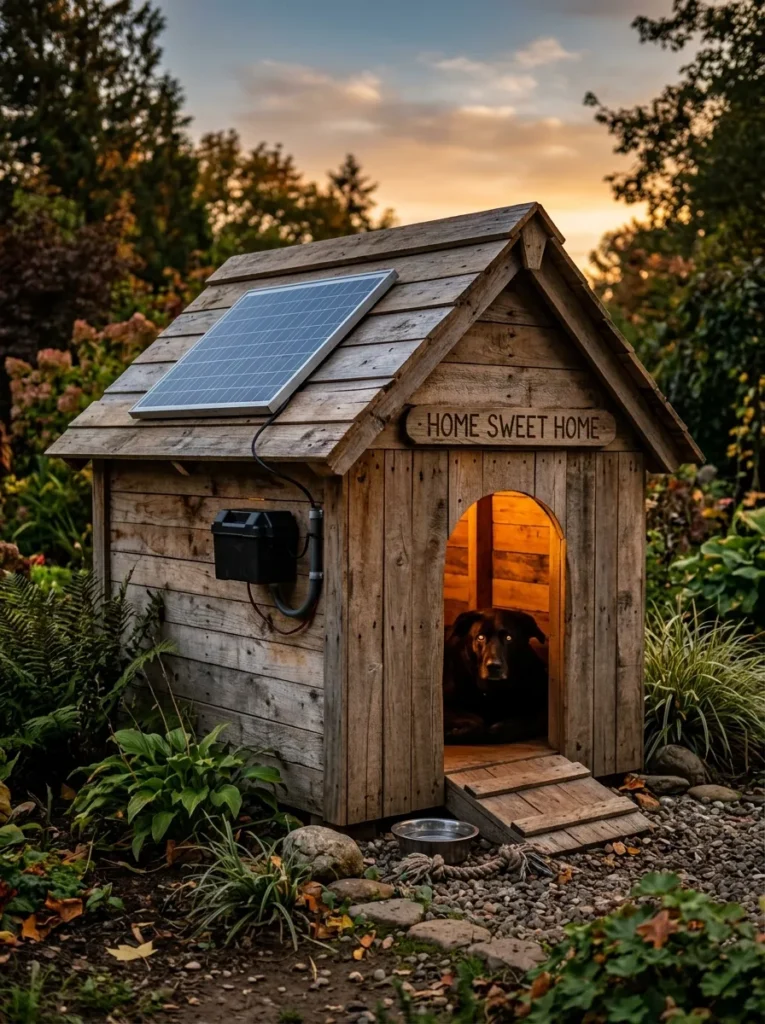
Vibe: Warm and self-sufficient — the dog house that provides light through the night without any electrical installation or running cost.
Why it works: A small solar panel and 12V LED lighting system in a pallet dog house applies the principle of appropriately scaled off-grid power — a single 5W solar panel is more than sufficient to charge a small lithium battery during daylight hours to power a warm white LED strip light inside the dog house through a full night. The practical benefit of interior lighting in a dog house is primarily behavioral rather than visual from the dog’s perspective — a warm interior light reduces the startle response that causes some dogs to avoid a fully dark enclosed space and makes the house interior visible and inviting from the dog’s outdoor position when darkness falls. The solar system requires no electrical installation, no grid connection, and no ongoing electricity cost.
How to get it: Mount a 5W monocrystalline solar panel on the south-facing roof slope using two stainless steel mounting brackets screwed through the roofing material to the roof sheathing below. Connect the panel to a small 12V lithium battery with an integrated charge controller (available as a single unit from camping and RV suppliers for $15–$25) mounted in a weatherproof box on the exterior wall. Connect a 12V warm white LED strip (2700K, approximately 1–2 watts total) to the battery output, running the cable through a 10mm hole drilled in the wall and sealed with waterproof grommet. The LED strip inside the house will illuminate automatically when the solar panel stops charging at dusk, with the battery providing 10–20 hours of continuous operation.
| Product |
|---|
| 5W monocrystalline solar panel small |
| 12V lithium battery with charge controller |
| 12V warm white LED strip 2700K |
| Weatherproof outdoor cable box |
| Waterproof cable grommet set |
12. Pallet Dog House with Removable Roof for Cleaning
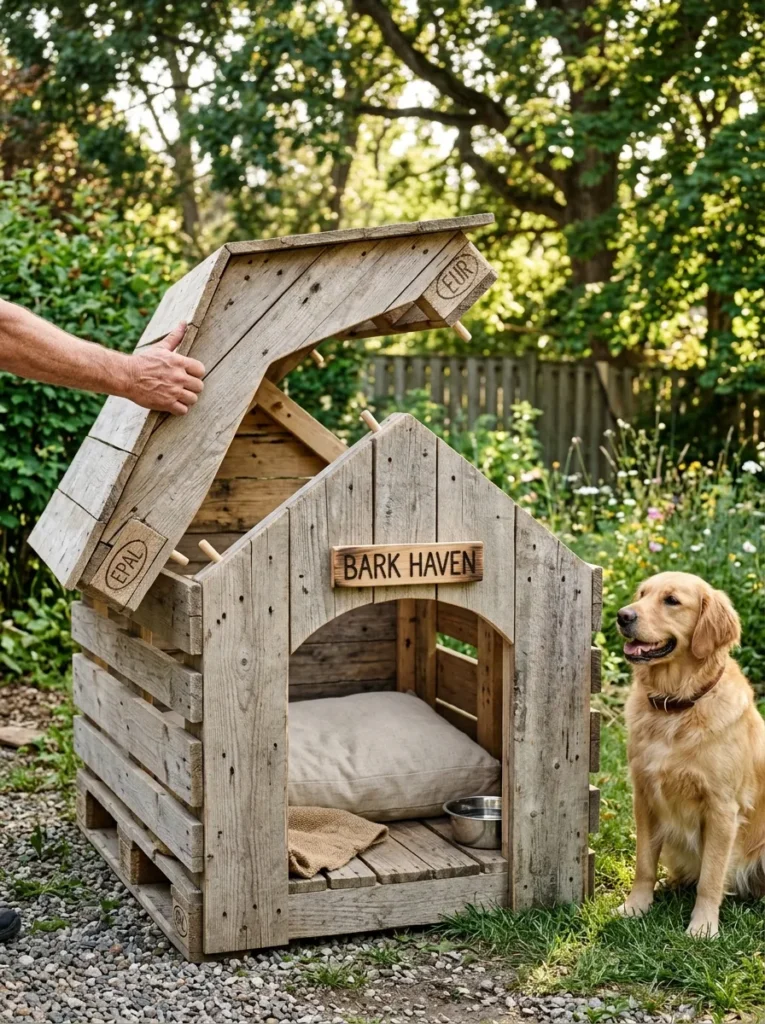
Vibe: Practical and clever — the dog house whose maintenance takes two minutes rather than requiring tools and a second person.
Why it works: A hinged or fully removable roof panel on a pallet dog house applies the design principle of maintenance accessibility — a dog house interior that cannot be easily cleaned will accumulate parasites, bacteria, and odors that affect the dog’s health and reduce their willingness to use the structure. Most commercial dog houses and many DIY builds make interior cleaning difficult enough that it rarely happens; a lift-off or hinged roof that provides complete top access to the interior makes weekly cleaning achievable in under five minutes with a brush and a bucket of water. The alignment pin system (four short dowels on the wall top plates that fit into corresponding holes in the roof frame underside) provides accurate repositioning of the removable roof while preventing wind displacement.
How to get it: Build the wall frames as normal but stop the stud height 50mm below the intended roof eave height. Build the roof as a separate assembly — rafters, sheathing, and roofing material — with a perimeter frame at its base that overlaps the wall top plates by 50mm on all four sides. Drill 12mm holes in the wall top plate corners and cut 12mm dowel pins to 60mm length, gluing them into the wall top plate holes — these pins project 30mm above the top plate and locate into corresponding 12mm holes drilled in the roof frame underside corners. The roof sits on and lifts off the pins without requiring any tools.
| Product |
|---|
| Dowel pin set 12mm diameter |
| Drill bit 12mm for pin holes |
| Piano hinge alternative for hinged roof |
| Waterproof sealant for roof perimeter |
| Brush set for interior cleaning |
13. Pallet Dog House with Attached Run
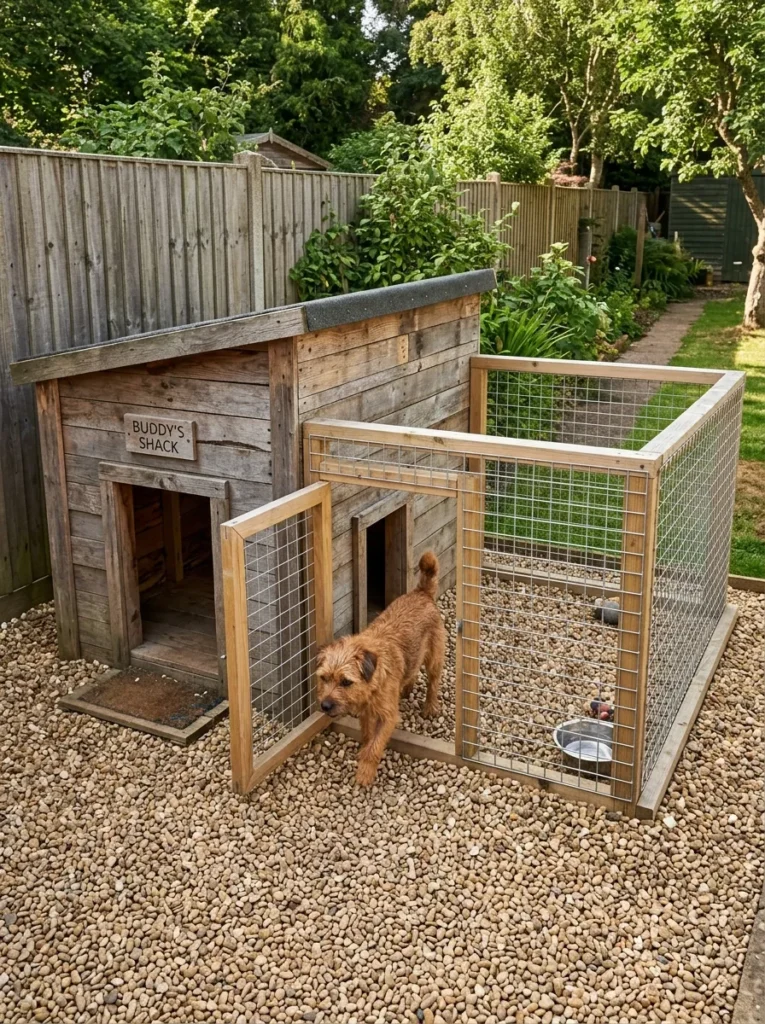
Vibe: Practical and considered — the integrated shelter and run that gives a dog a complete outdoor living space in a single structure.
Why it works: An attached run converts a dog house from a sleeping-only structure to a complete outdoor living environment — the dog has weather-protected sleeping space in the house and a defined, secure outdoor movement space in the attached run, all within a single contained structure that can be positioned on a gravel base anywhere in the yard. The connecting door between house and run is the behavioral key — dogs in an attached house-and-run system voluntarily move between the sleeping space and the movement space throughout the day according to weather, temperature, and activity preference, which produces a more behaviorally rich outdoor experience than either a house alone or a run alone provides. Pea gravel on the run floor provides drainage, prevents mud accumulation, and reduces the bacterial load from eliminations far more effectively than grass or packed earth.
How to get it: Build the dog house first as a standard structure, then frame the attached run using 2×4 lumber posts at 1m intervals with welded wire fencing panels attached using U-staples. Connect the house to the run through a 40cm opening cut in the house side wall at ground level, framed with 2×4 lumber. Cover the run base with a 100mm layer of pea gravel over a weed barrier fabric. If the run requires a roof (for fully contained security), use welded wire fencing panels flat-laid across the top of the run perimeter frame.
| Product |
|---|
| Welded wire fencing panel galvanized |
| 2×4 lumber for run frame posts |
| U-staple set for wire attachment |
| Pea gravel bag for run floor |
| Weed barrier fabric for run base |
14. Painted Storybook Pallet Dog House
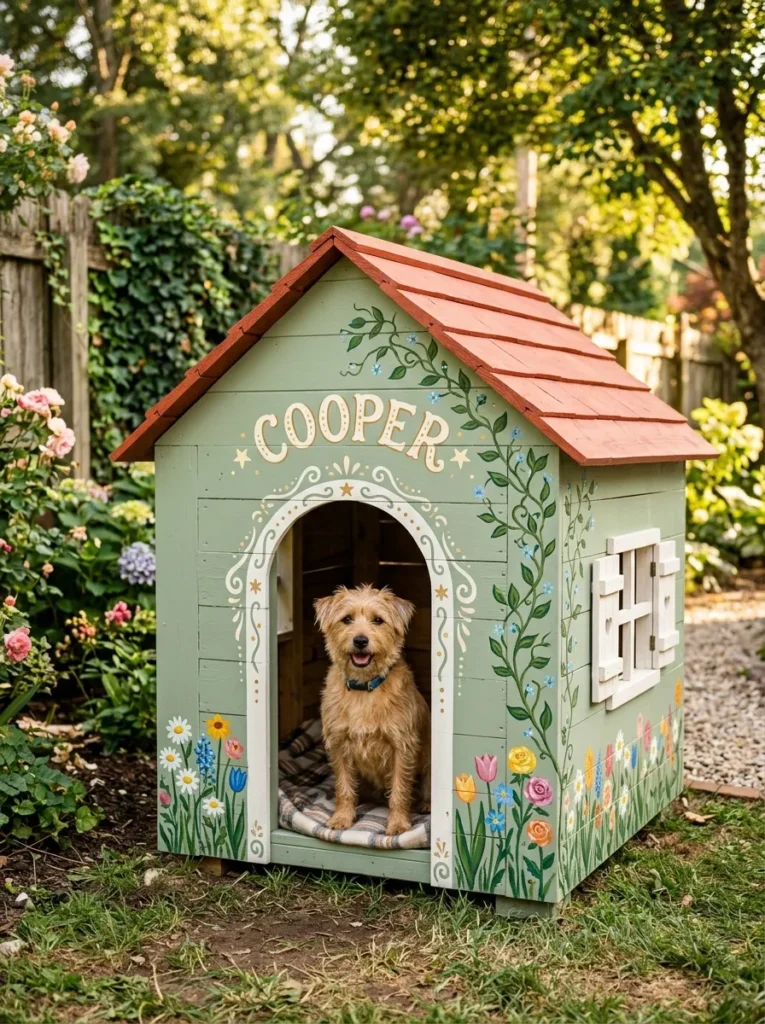
Vibe: Whimsical and warm — the dog house that makes the backyard feel like a children’s book illustration come to life.
Why it works: A storybook-painted pallet dog house applies the design principle of narrative decoration — hand-painted climbing vines, an arched door frame, the dog’s name in painted letters, and a flower border give the structure a visual story that makes it a genuine garden feature rather than simply a pet facility. The painting is the most accessible customization available to any builder regardless of woodworking skill level — even basic exterior house painting with a few added decorative brush details transforms a structural box into something with character and personal investment. The sage green and terracotta color combination is the palette that most naturally references the storybook illustration aesthetic while remaining harmonious with garden plantings.
How to get it: Build the house in the standard gable roof configuration, then invest the customization effort in the paint treatment rather than the structural complexity. Apply a base coat of sage green exterior paint to the house body, terracotta to the roof trim if separate trim boards are installed, and white to the door frame arch (cut an arch template from cardboard and trace it onto the door frame before painting for clean edges). The climbing vine, flower border, and lettering are applied in a final session using smaller brushes and acrylic exterior paint — these decorative elements require artistic intent rather than technical skill, and the loose, imperfect quality of hand-painted decoration is more charming than the mechanical perfection of stenciled or printed alternatives.
| Product |
|---|
| Sage green exterior paint |
| Terracotta exterior paint for roof trim |
| White exterior paint for arch and shutters |
| Small brush set for decorative painting |
| Exterior varnish for painted surfaces |
15. Complete Pallet Dog Estate — House, Run, and Feeding Station
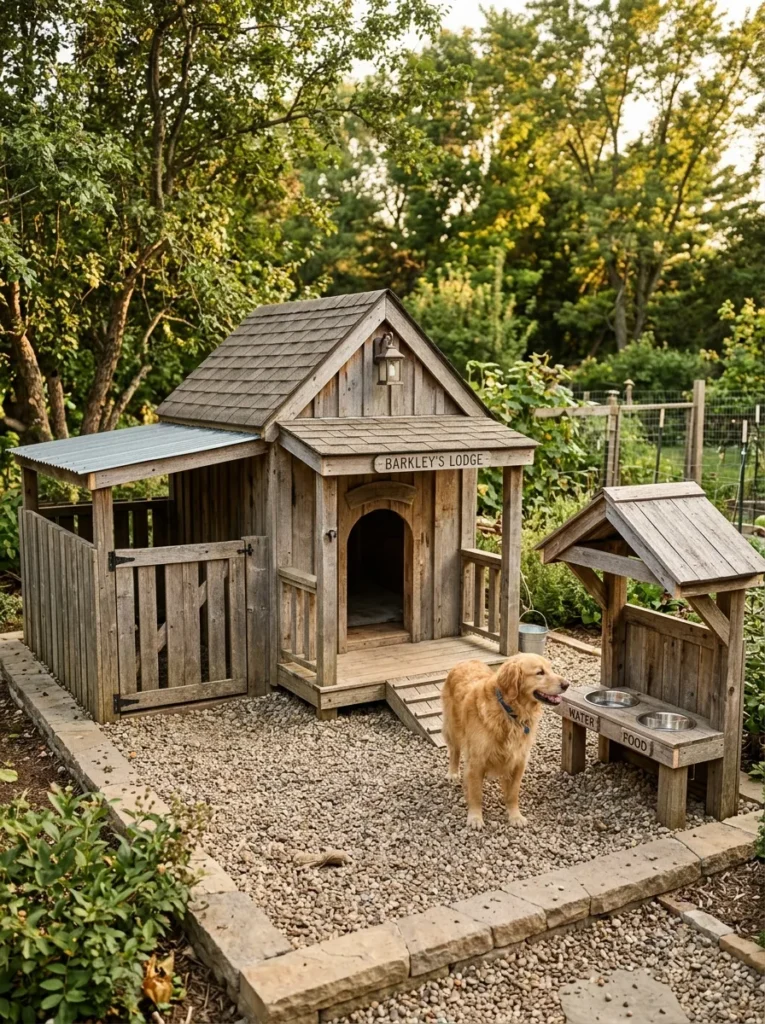
Vibe: Considered and complete — the pallet dog estate that tells every visitor exactly how seriously this household takes its dog’s quality of life.
Why it works: A complete pallet dog estate combining a house, run, and feeding station applies the design principle of functional zone planning — providing the dog with a designated space for each primary outdoor activity (sleeping, exercise and containment, and eating) within a single connected complex that shares material and finish consistency. The estate approach eliminates the visual fragmentation of separate facilities placed independently around the yard and creates a single, considered outdoor space whose complexity reflects genuine investment in the dog’s wellbeing. The covered feeding station is the most immediately practical addition — rain on dry kibble creates a soiled, unpalatable feeding surface; a small roof over the food and water bowls keeps them clean and dry through weather events and reduces food waste dramatically.
How to get it: Plan the full estate on paper before beginning construction — the house, run, and feeding station should share a continuous gravel base foundation that is prepared first, before any individual structure is built. Build the central house first, then frame and attach the run to one side wall and the feeding station to the other. Design the feeding station as a simple lean-to structure — two posts, a sloped roof, and a shelf board for the raised bowls — using the house side wall as its third structural element. Apply the same stain or paint treatment to all three components in a final unified finishing session for visual continuity across the full estate.
| Product |
|---|
| Raised food bowl set for feeding station |
| Lean-to roof lumber for feeding station |
| Gravel bag for full estate base |
| Exterior wood stain unified for all components |
| Weed barrier fabric for full gravel base |
How to Start Your Pallet Dog House Build
Start by sourcing and verifying pallets. Before purchasing any lumber, tools, or roofing materials, locate three to five HT-stamped pallets from a nearby source — garden centers, hardware stores, grocery distribution centers, and furniture retailers typically dispose of pallets weekly and give them away at no cost to anyone who asks. Inspect every pallet before accepting it: confirm the HT stamp on the stringer board, reject any pallet with broken or missing boards, avoid pallets with oil stains or chemical residue on the boards, and check for nail protrudence on the board faces that will need to be addressed during disassembly. This sourcing step is the foundation on which every subsequent build decision rests — adequate, high-quality pallets make the build straightforward; inadequate or contaminated pallets make it unsafe.
The most common mistake beginner pallet dog house builders make is underestimating the time required for pallet disassembly — the step that converts whole pallets into usable individual boards. Pallets are assembled with ring-shank nails designed for permanent installation, and separating boards from stringers without splitting the boards requires patience, the right tools, and the right technique. The most reliable disassembly method uses a reciprocating saw to cut the nails between each board and the stringer (rather than pulling the boards away from the nails) — this preserves the full board length and avoids the splitting that pry bar-only techniques cause in approximately 30% of boards. Budget two hours for disassembling three pallets into clean, usable boards — a realistic time estimate prevents the frustration of an abandoned first session.
Three items under $50 that make every pallet dog house build better: A tube of waterproof construction adhesive ($8–$12) used in addition to exterior screws at all board-to-frame joints — the adhesive fills gaps and provides weather sealing that screws alone cannot achieve; a roll of EPDM roofing membrane ($15–$25 for a small roll sufficient for one dog house roof) that provides a fully waterproof roof surface over any simple flat or near-flat roof design; and a can of pet-safe exterior wood stain ($15–$20) that seals the pallet boards against moisture and UV degradation while leaving the natural timber grain visible — significantly extending the structure’s useful life compared to unpainted pallet board exterior surfaces.
Realistic expectations: Project 1 (flat roof shelter) can be completed in a single afternoon by an adult with basic tool familiarity — approximately 4 hours of active work time. Projects 2–5 (standard gable roof configurations with variations) require one full weekend — approximately 8–12 hours of active work across two days. Projects 6–10 (more complex configurations including duplex, estate, and specialty roofs) typically require two weekends of work — 16–20 hours of active build time. Every project benefits from a dry run assembly (building all components without permanent fastening to verify dimensions and fit) before final assembly with glue and screws — this single practice saves more rework time than any other efficiency habit in beginner woodworking.
Frequently Asked Questions About Pallet Dog House Projects
How do I know if a pallet is safe to use for a dog house?
The definitive safety indicator is the stamp on the pallet’s stringer board (the thick middle board connecting the top and bottom decks). HT (heat treated) indicates the pallet was heat-sanitized to kill insects and biological material without chemical treatment — completely safe for dog house use. DB (debarked) and KD (kiln dried) are also safe. MB (methyl bromide) indicates chemical fumigation treatment — never use for any animal or food contact application. Pallets without any stamp are of unknown treatment status and should be avoided for dog house use. Beyond the treatment stamp, reject any pallet with: dark staining or discoloration suggesting chemical or oil contact, strong chemical or solvent odor, broken or heavily cracked boards, visible mold growth, or boards with significant rot at the stringer contact points.
What size should a pallet dog house be for my dog?
The standard sizing formula for dog houses is: interior length = dog’s body length (nose to tail base) multiplied by 1.25; interior width = dog’s body length multiplied by 1.0; door opening height = dog’s shoulder height multiplied by 1.5; interior ridge height = dog’s shoulder height multiplied by 1.75. These proportions produce a house large enough for the dog to enter, turn around, and lie stretched out, but small enough for the dog’s body heat to warm the interior efficiently. A house that is too large is cold in winter — the dog cannot warm the interior volume effectively — while a house that is too small prevents comfortable movement and is avoided. Measure your specific dog before calculating dimensions rather than relying on breed-average measurements.
How long will a pallet dog house last outdoors?
An untreated pallet dog house with minimal weatherproofing lasts 3–5 years in most temperate climates before structural deterioration begins at exposed timber joints. A properly treated pallet dog house — all exterior surfaces painted or stained with a quality exterior wood finish, all joints sealed with waterproof construction adhesive or caulk, roof covered in EPDM or quality asphalt shingles, and floor elevated off the ground — lasts 10–15 years with minimal maintenance. The specific maintenance actions that most extend pallet dog house life are: annual reapplication of exterior stain or paint to any areas showing wear; re-caulking of any joints showing gap separation; and immediate replacement of any roofing material showing signs of lifting or cracking before water penetration compromises the structural timber below.
Can I add heating to a pallet dog house for very cold climates?
Low-wattage heated pet mats (sold specifically for outdoor dog houses and rated for outdoor use) are the safest and most practical heating solution for a pallet dog house — they draw 30–100 watts depending on size, maintain a surface temperature of approximately 35–40°C, and have chew-resistant cord covers and automatic overheat protection. Never use human electric heating blankets, space heaters, or heat lamps in a dog house — these present genuine fire and electrical hazard risks in a confined timber structure. The solar LED system in project 11 can be extended to power a low-wattage heated pet mat if the solar panel and battery are sized appropriately (minimum 20W panel and 20Ah battery for a 30W heated mat). Proper insulation (project 4) is always the first intervention in cold climates — a well-insulated house requires significantly less supplementary heat or none at all in most cold-climate applications.
Do dogs actually use pallet dog houses they have been provided?
Dogs use outdoor houses most reliably when three conditions are met: the house is correctly sized (too large or too small both discourage use), the house is positioned correctly in the yard (in a location the dog already frequents, preferably against a solid fence or structure that provides a sense of backing, and facing away from the prevailing wind direction), and the house is introduced positively (feeding the dog in and around the house before expecting them to sleep in it, placing familiar bedding or a worn item of clothing inside, and never using the house as a confinement punishment). Dogs who have been allowed indoor access before being transitioned to outdoor living typically take 2–4 weeks to begin using an outdoor house voluntarily, while dogs who have always been primarily outdoor dogs typically investigate and use a new house within the first 24–48 hours.
Ready to Build Your Dog’s Dream Pallet House?
These 15 projects cover the complete range of what pallet construction can provide for a dog — from the simplest one-afternoon flat roof shelter that immediately improves a dog’s outdoor comfort, to the complete three-component estate that provides sleeping, exercise, and feeding facilities in a single designed complex. Every pallet dog house build begins with the same first action — sourcing three HT-stamped pallets from a nearby business that disposes of them regularly, verifying their safety stamp, and bringing them home. That sourcing trip, which costs nothing and takes an hour, is the beginning of a project that costs a fraction of any commercial dog house at the same size and quality, uses material that would otherwise be discarded, and produces a structure that carries the specific quality of having been made for a specific dog by someone who cared enough to spend a weekend doing it. Save the project that matches your dog’s size, your climate, and your weekend ambition — and start with that pallet sourcing trip this week.