DIY pet accessories are handmade items — collars, beds, toys, and feeding gear — crafted from durable, pet-safe materials that let you customize both style and function for your specific animal. This article gives you 14 specific, buildable ideas for crafting accessories that keep pets happy and homes stylish. There’s a particular satisfaction to handmade pet gear: a collar in exactly the right shade of clay, a bed sized precisely to your dog’s curled-up shape, a toy stitched from scraps that would otherwise go to waste. It borrows from both traditional leathercraft and the modern maker movement’s DIY pet-goods boom, which is exactly why there’s a project here for every skill level. Here are 14 ideas worth saving — and stealing.
Why DIY Pet Accessories Work So Well
DIY pet accessory making draws from two traditions: traditional leathercraft and saddlery, which shaped the durable collar and leash designs still used today, and the modern maker movement that emerged alongside Etsy and craft blogs, favoring small-batch, customizable goods over mass-produced pet store items. What makes handmade pet gear distinct from store-bought versions is fit and material honesty — a bed sewn to your specific pet’s size or a collar cut from a hide you chose yourself carries a level of intention no standard product line offers.
The material and color language spans vegetable-tanned leather in warm cognac and walnut tones, heavyweight canvas in oat and clay, and cotton rope in warm white and natural jute tones. Hardware stays simple and durable — solid brass buckles, D-rings, and rivets rather than plastic clips, since brass ages with a patina instead of yellowing or cracking over time.
This style is trending now because pet ownership has grown alongside a broader slow-craft and sustainability movement, with more people choosing to make or commission pet goods rather than buy mass-produced plastic versions that wear out quickly. Search data for “DIY dog collar” and “handmade pet bed” has climbed steadily as more crafters document their own pet-gear projects online.
Small spaces and small budgets can absolutely achieve this style, since most projects use minimal materials and scale down easily — a single collar or a small braided toy costs only a few dollars in materials. Prioritize one functional piece, like a collar or leash, before moving on to larger projects like a bed.
Style at a Glance
| Element | Traditional Leathercraft | Modern Maker Textile |
|---|---|---|
| Philosophy | Durable, hand-tooled | Customizable, soft-goods |
| Materials | Vegetable-tanned leather, brass | Canvas, cotton rope, cotton batting |
| Color palette | Cognac, walnut, brass | Oat, clay, warm white |
14 DIY Pet Accessory Ideas for Happy Pets
1. Vegetable-Tanned Leather Collar
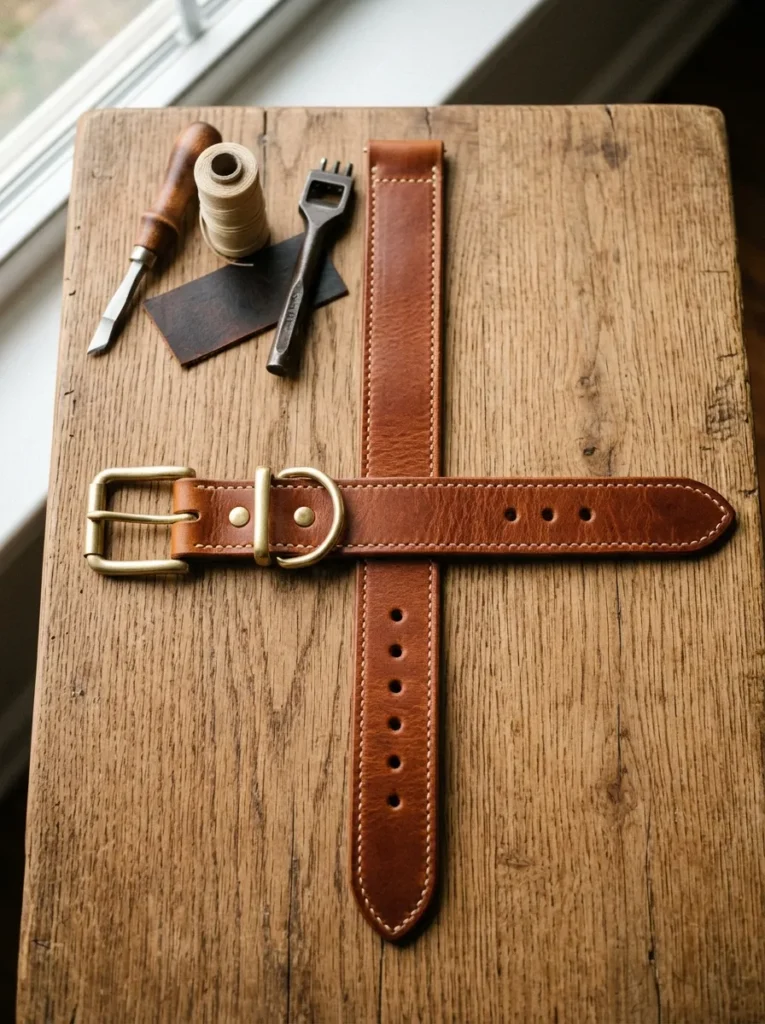
Vibe: Warm, like the collar was made to age alongside its wearer.
Why it works: Vegetable-tanned leather develops a deepening patina with wear and sun exposure, a material principle where the collar actually improves in appearance over time rather than degrading the way synthetic materials do.
How to get it: Cut a strip of 8-10oz vegetable-tanned leather to your pet’s neck measurement plus 4 inches, punch holes at 1-inch intervals, and attach a solid brass buckle and D-ring using rivets rather than glue for a hold that won’t loosen with daily wear.
Shop the Look
| Product |
|---|
| Vegetable-tanned leather strip 8-10oz |
| Solid brass buckle hardware set |
| Brass D-ring and rivet kit |
| Leather hole punch tool |
| Leather edge beveler tool |
Also view: 15 Dog Corner Ideas That Blend with Your Decor
2. Canvas and Rope Braided Tug Toy
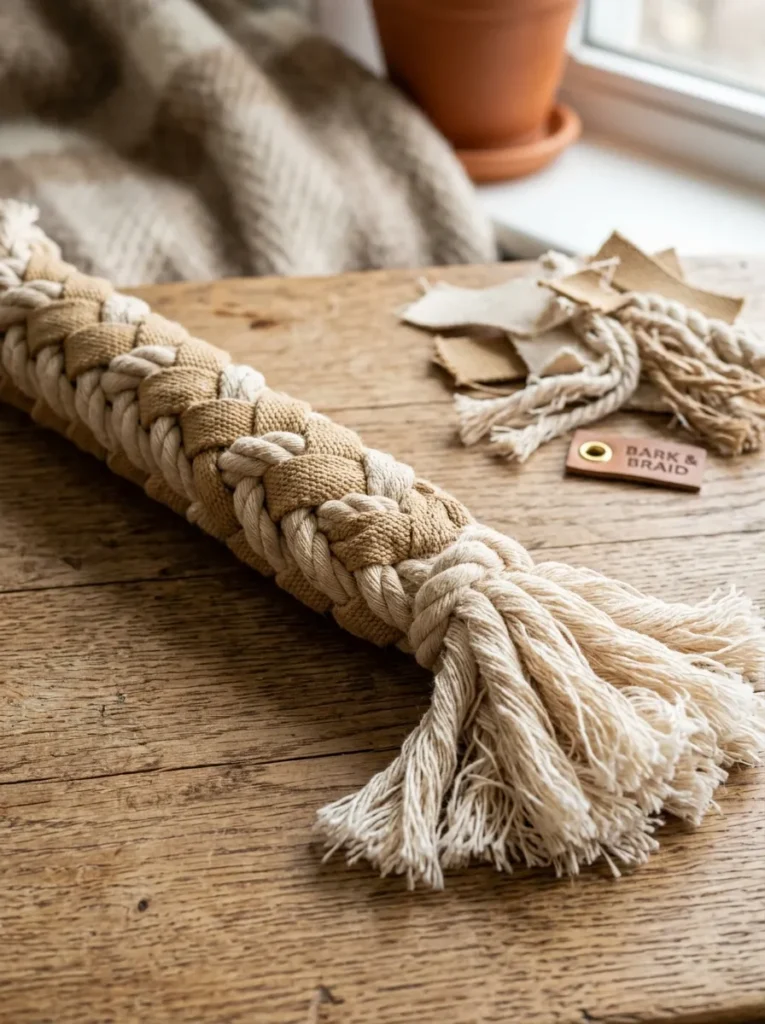
Vibe: Playful, like the toy was built specifically to survive enthusiastic tugging.
Why it works: Braiding three strands together rather than using a single rope length distributes bite pressure across multiple fibers, a construction principle that makes the toy significantly more durable than an unbraided single-strand version.
How to get it: Cut three equal lengths of heavyweight canvas strip and cotton rope, knot them together at one end, braid tightly to the other end, and finish with a second secure knot, leaving a few inches of frayed rope for texture.
Quick Win: Old canvas tote bags or denim scraps work just as well as new canvas fabric for this project.
Shop the Look
| Product |
|---|
| Heavyweight canvas fabric strip |
| Natural cotton rope 3/8 inch |
| Fabric scissors sharp |
| Canvas scrap remnant bag |
| Fray-check fabric sealant |
Also view: 14 Dog Fence Ideas for Beautiful Pet-Friendly Yards
3. Clay-Toned Linen Dog Bed Cover
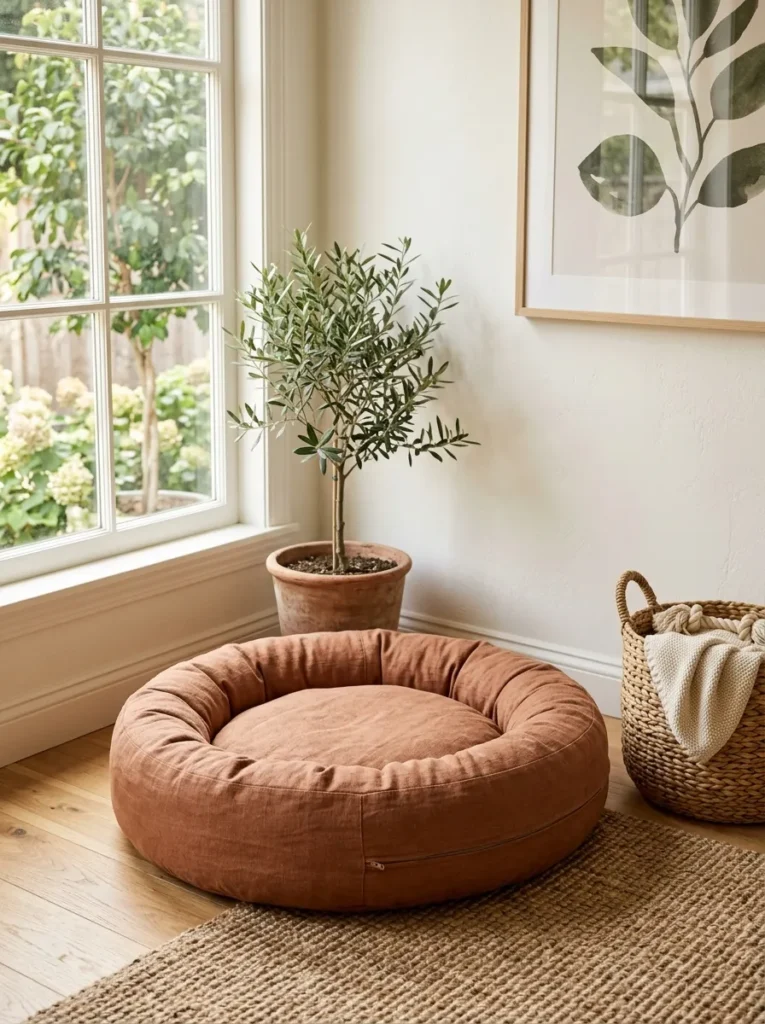
Vibe: Warm, like the bed was chosen to match the room, not just tossed into a corner.
Why it works: A removable, washable cover in a specific color sewn to match the room’s palette treats the bed as a piece of furniture rather than a purely functional pet item, a material principle that lets the accessory blend into the home’s existing design.
How to get it: Sew a round or rectangular linen cover in clay-toned fabric with a hidden zipper closure sized to fit your existing bed insert, choosing a durable linen-cotton blend that holds up to regular washing.
Shop the Look
| Product |
|---|
| Clay-toned linen-cotton blend fabric |
| Invisible zipper 24 inch |
| Round bed foam insert |
| Sewing machine heavy-duty needle set |
| Fabric marking chalk |
4. Brass Nameplate ID Tag
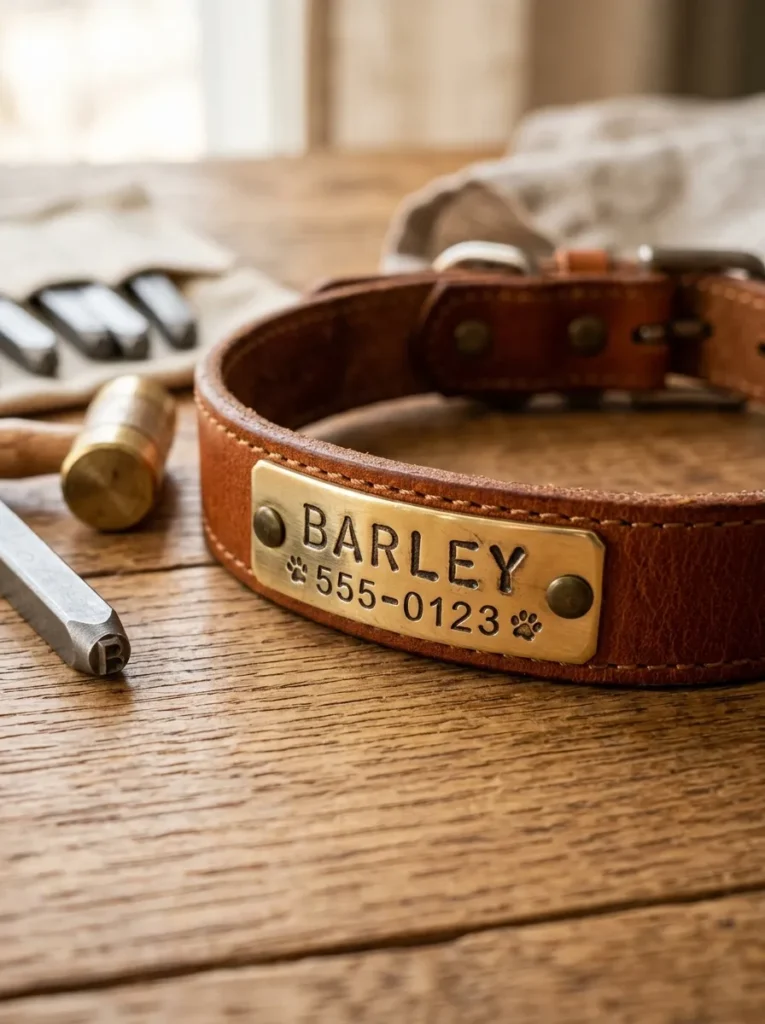
Vibe: Precise, like every letter was placed with real care.
Why it works: Hand-stamping the tag rather than using an engraved machine font adds slight, deliberate imperfection, a craft principle where visible handwork signals a level of personalization a store-bought tag can’t replicate.
How to get it: Use a metal letter stamp set and a small brass blank, striking each letter with a mallet on a hard steel bench block, then darken the stamped letters with a permanent marker wiped clean from the surface for contrast.
Shop the Look
| Product |
|---|
| Brass blank tag set round |
| Metal letter stamp set |
| Steel bench block |
| Small brass jump ring set |
| Permanent marker for stamp fill |
5. Small-Space Wall-Mounted Leash Hook
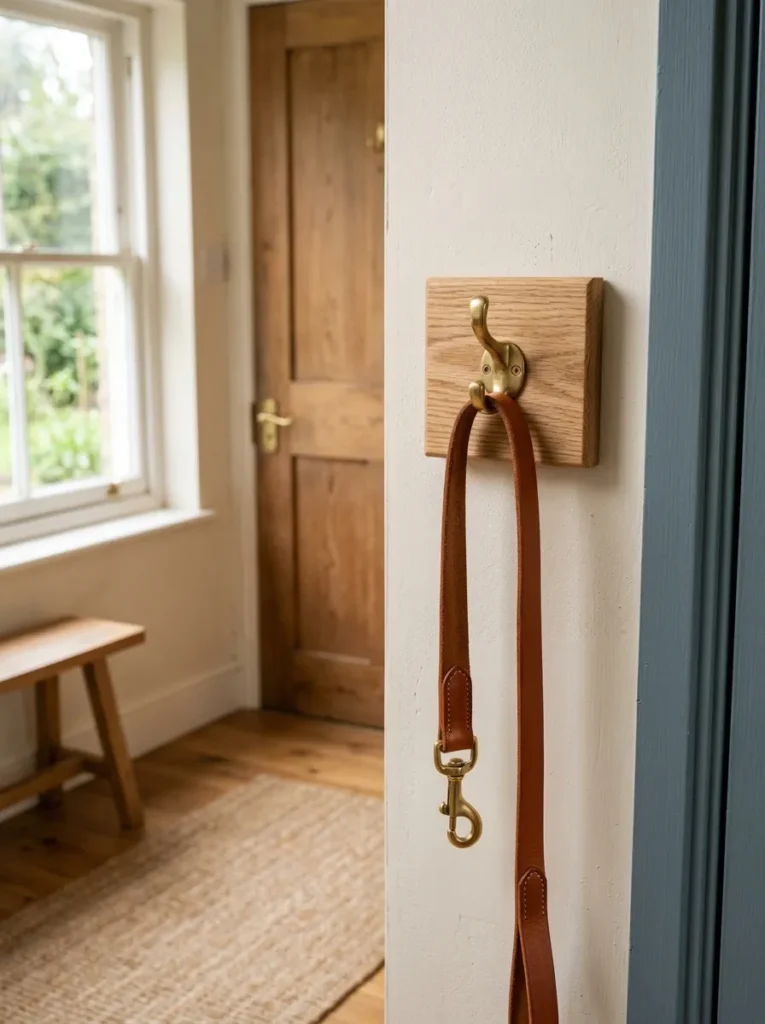
Vibe: Functional, like the leash finally has a proper home instead of a doorknob.
Why it works: A small mounted block with a single hook uses minimal wall space to solve the daily friction of leash storage, a small-space technique that adds function without any footprint at all.
How to get it: Cut a 3×5 inch oak block, sand and finish it with a light oil, then attach a single polished brass hook centered on the block and mount it beside your most-used exit door.
Shop the Look
| Product |
|---|
| Oak wood block pre-cut |
| Polished brass hook single |
| Danish oil wood finish |
| Wall anchor mounting screws |
| Leather leash handmade |
6. Sage and Oat Woven Cat Toy Set
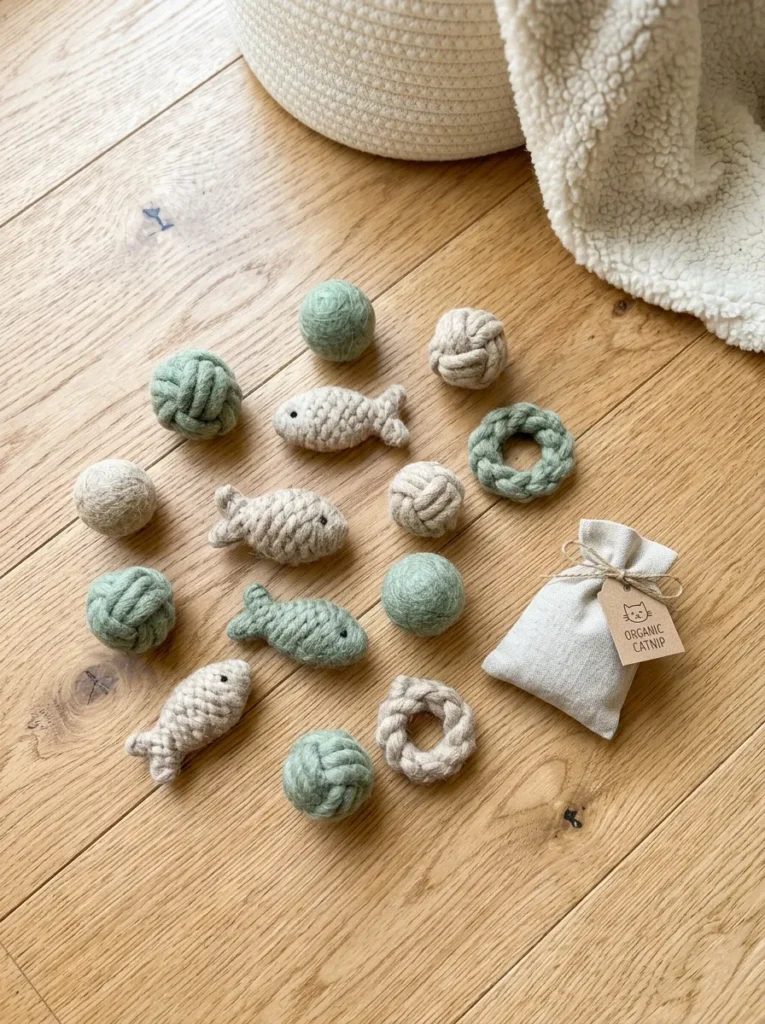
Vibe: Cheerful, like the toys were designed to disappear under furniture in the most colorful way possible.
Why it works: Felt holds its shape without stuffing shifting or leaking the way a stitched fabric pouch might, a material choice that makes the toy more durable through repeated batting and carrying by a cat.
How to get it: Cut small felt shapes in sage and oat, stitch two matching pieces together leaving a small gap, fill lightly with catnip and stuffing, then whip-stitch the opening closed for a toy under 3 inches.
Shop the Look
| Product |
|---|
| Wool felt sheet sage tone |
| Wool felt sheet oat tone |
| Loose catnip bag |
| Polyester stuffing small bag |
| Embroidery needle and thread set |
7. Warm Task Light Grooming Station
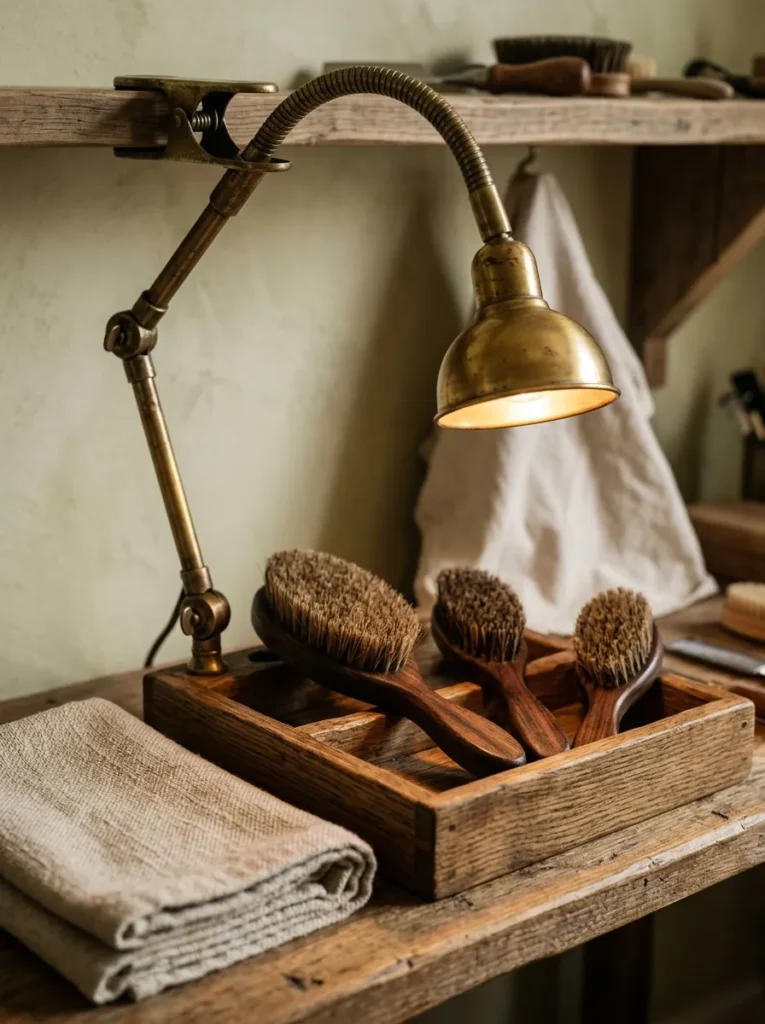
Vibe: Functional, like grooming time finally has its own proper setup.
Why it works: Adding a dedicated task light over a grooming zone uses light behavior to make small details, like nail trimming, visible enough to work confidently, a lighting principle that reduces the guesswork of poor ambient lighting.
How to get it: Clip a brass articulating task lamp to the nearest shelf or table edge, angling it downward over a small oak tray holding brushes and clippers, using a warm 3000K bulb for the clearest color rendering.
Shop the Look
| Product |
|---|
| Brass clip-on articulating task lamp |
| Oak wood grooming tray |
| Warm white 3000K bulb |
| Canvas grooming towel |
| Small brush and comb set |
8. Layout: Dedicated Feeding Station Mat
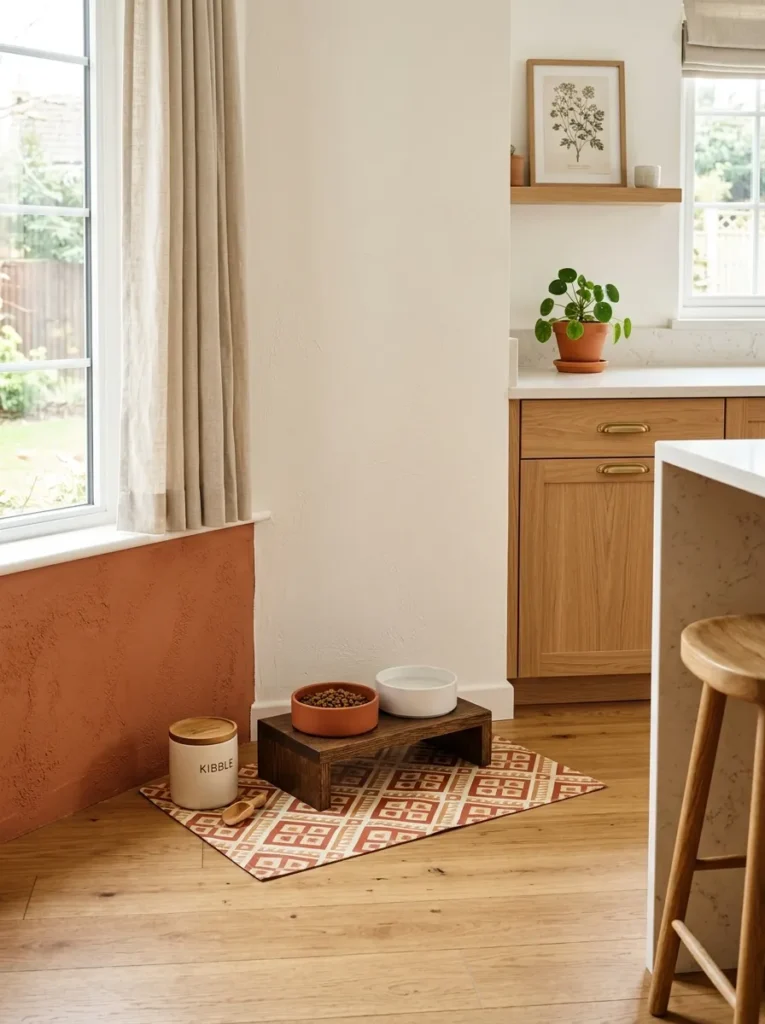
Vibe: Organized, like the feeding corner was planned into the kitchen from day one.
Why it works: Positioning a defined mat just outside the main kitchen walkway respects traffic flow, a layout principle that keeps water spills and bowls from becoming a daily obstacle during meal prep.
How to get it: Sew a wipeable oilcloth mat sized to fit two bowls plus a few inches of margin, choosing a corner at least 24 inches clear of any cabinet swing, and finish the edges with bias tape to prevent fraying.
Shop the Look
| Product |
|---|
| Wipeable oilcloth fabric yard |
| Bias tape edge binding |
| Raised oak bowl stand |
| Stainless steel bowl set |
| Sewing machine heavy needle |
9. Small Nook Hammock Window Perch
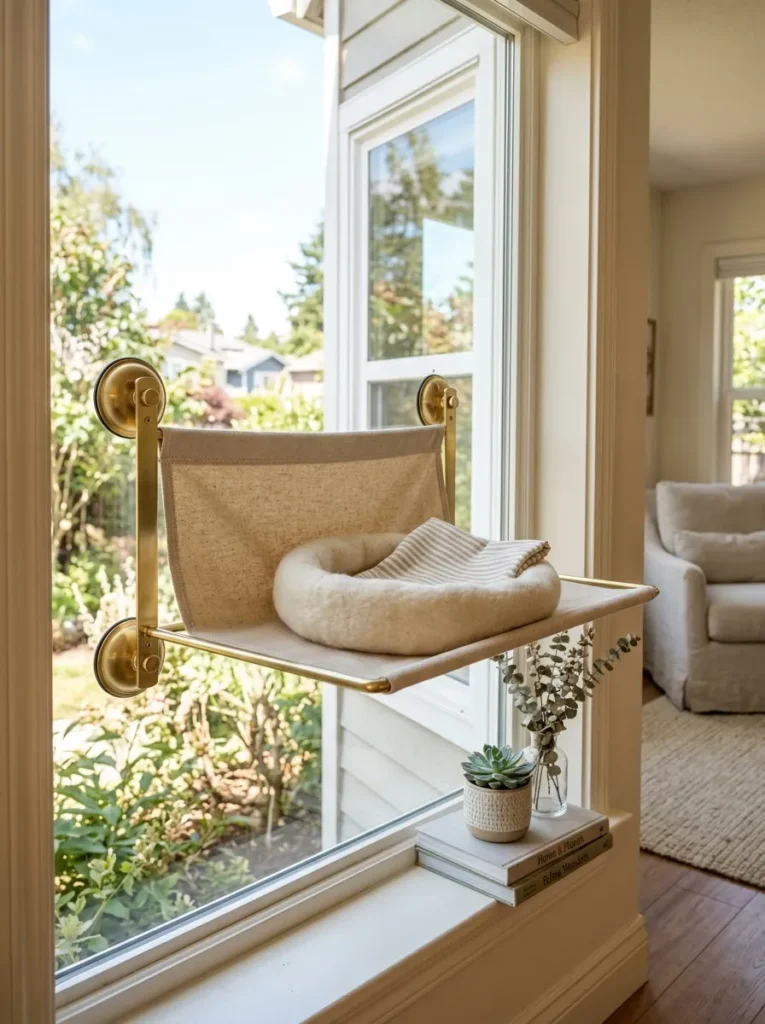
Vibe: Serene, like the sunniest spot in the house finally got claimed properly.
Why it works: A suction-mounted window perch uses vertical glass space that has zero competing function, an illusion technique that adds a full lounging spot without taking up any floor area at all.
How to get it: Sew a taut canvas hammock sling with reinforced corner grommets, then attach it to heavy-duty suction cup mounts rated for at least 15 pounds, positioning it on the sunniest window in the house.
Quick Win: A pre-made suction mount kit from a hardware store skips sourcing individual heavy-duty cups.
Shop the Look
| Product |
|---|
| Heavyweight canvas fabric |
| Brass grommet kit |
| Heavy-duty suction cup mount set |
| Small folded fleece blanket |
| Reinforced corner webbing strap |
10. Walnut and Brass Material Mix Feeding Stand
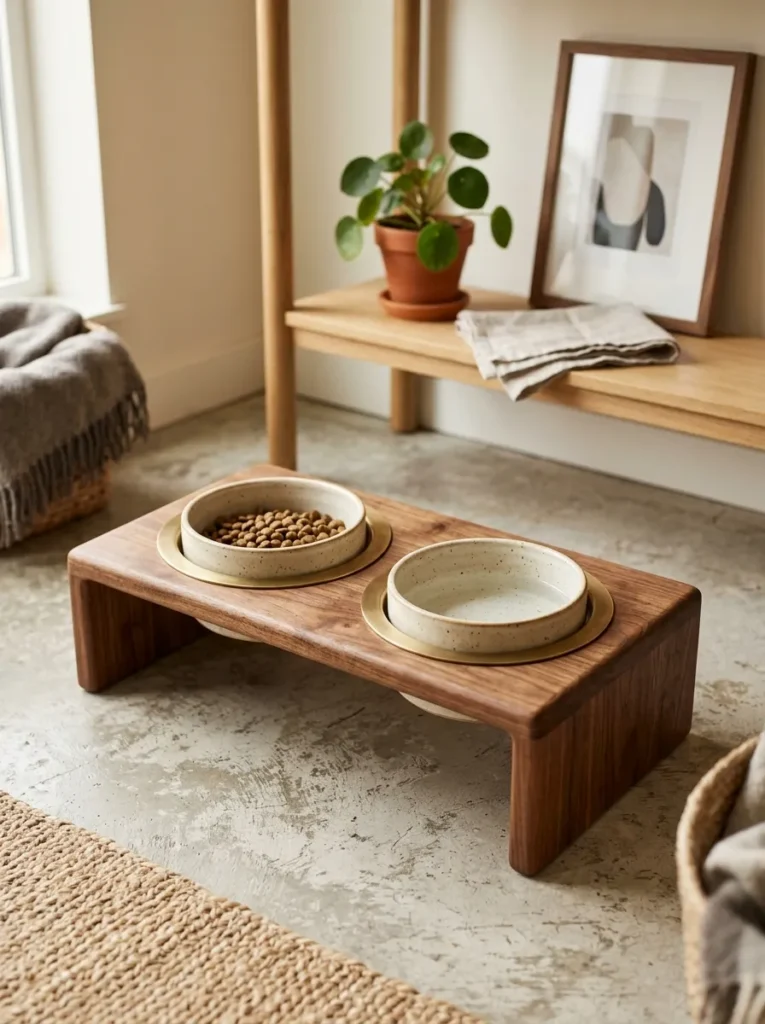
Vibe: Grounded, like the feeding stand was built to last for years, not months.
Why it works: Pairing solid walnut with brass bowl rings mixes a warm wood material with a reflective metal accent, a texture contrast principle that elevates a purely functional stand into something that reads as intentional furniture.
How to get it: Cut a walnut base frame raised 4 inches off the floor, drilling two circular openings sized to hold brass bowl rings that keep ceramic bowls from sliding during eating.
Shop the Look
| Product |
|---|
| Walnut wood board 1 inch thick |
| Brass bowl ring insert pair |
| Ceramic feeding bowl set |
| Wood glue and clamp set |
| Rubber non-slip foot pads |
11. Small Space Fold-Flat Travel Bed
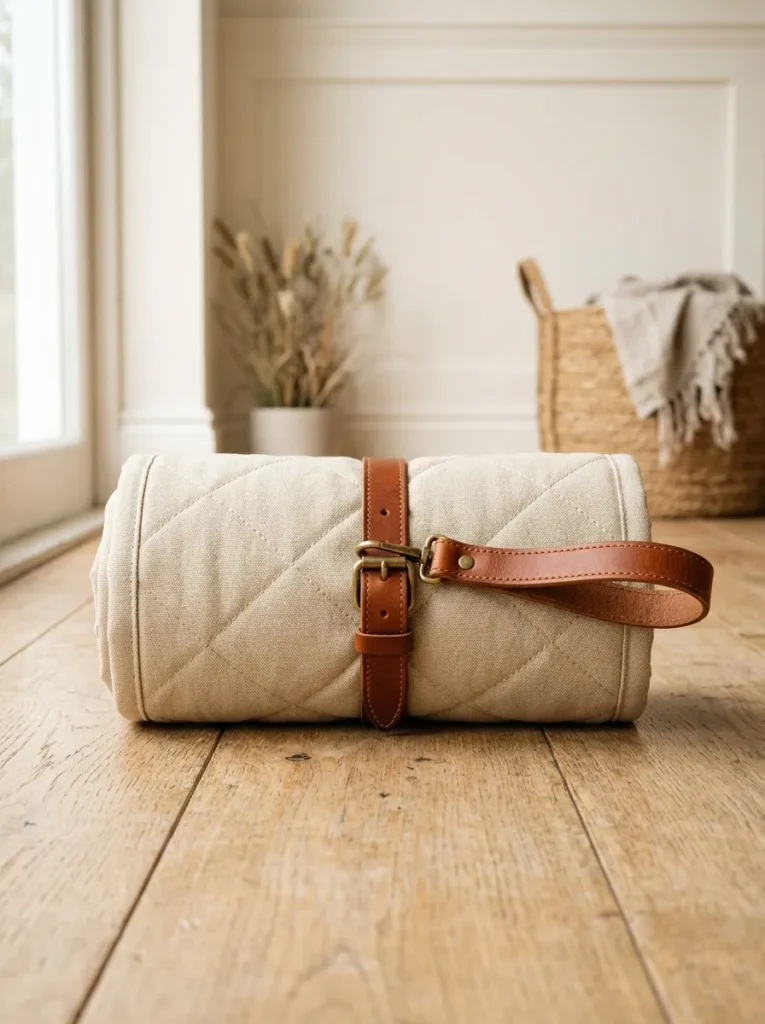
Vibe: Efficient, like a full bed collapses down to the size of a rolled towel.
Why it works: A quilted canvas bed that folds flat and rolls for storage solves the small-space and travel problem of a bulky bed taking up permanent room, an illusion technique that gives full function only when actually needed.
How to get it: Quilt two layers of canvas with a thin batting layer between them, sewing in a grid pattern for structure, then add a leather strap and brass buckle at one end so the rolled bed cinches closed for transport.
Shop the Look
| Product |
|---|
| Heavyweight canvas fabric two-tone |
| Cotton quilt batting thin |
| Cognac leather carrying strap |
| Brass buckle hardware |
| Heavy-duty sewing machine thread |
12. Warm White and Terracotta Color Blocked Leash
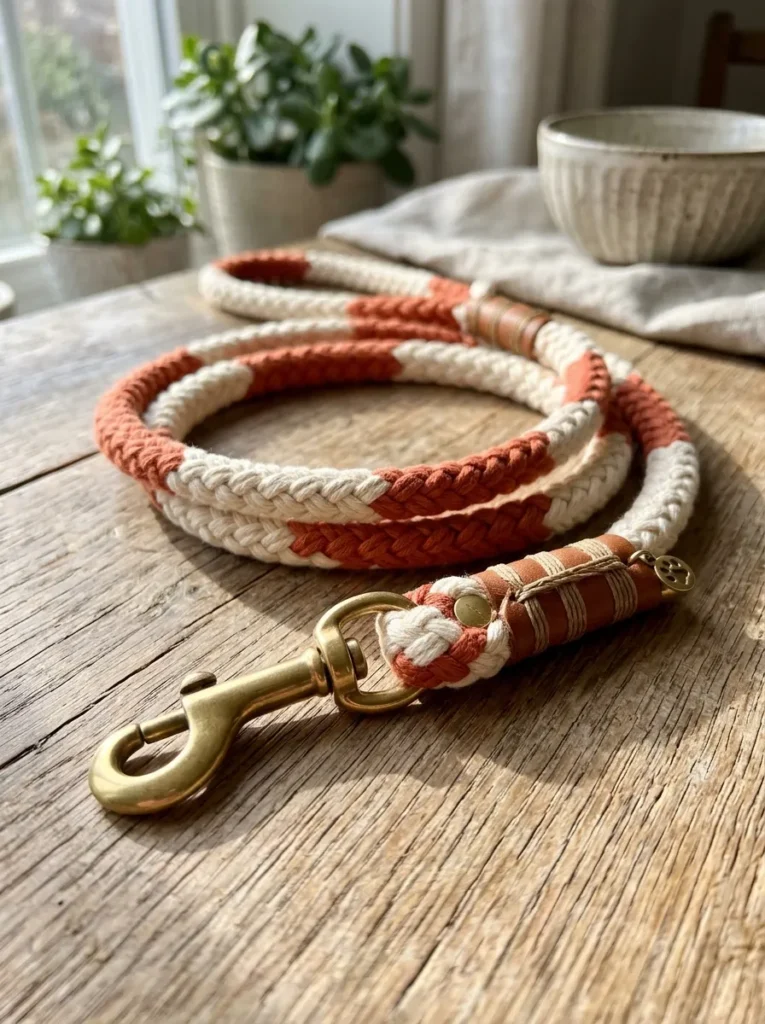
Vibe: Cheerful, like the walk itself got a small style upgrade.
Why it works: Dyeing sections of rope in alternating warm white and terracotta before braiding uses color rhythm within a single functional object, a principle that adds visual interest without needing any extra embellishment.
How to get it: Dye half a length of cotton rope in terracotta fabric dye, leave the other half natural, then braid the two sections together so the color transition falls roughly at the leash’s midpoint, finishing with a brass clip and leather handle wrap.
Shop the Look
| Product |
|---|
| Cotton rope 1/2 inch bulk |
| Terracotta fabric dye |
| Brass leash clip hardware |
| Cognac leather handle wrap |
| Rope whipping twine |
13. Small Nook Layout Litter Box Cabinet Insert
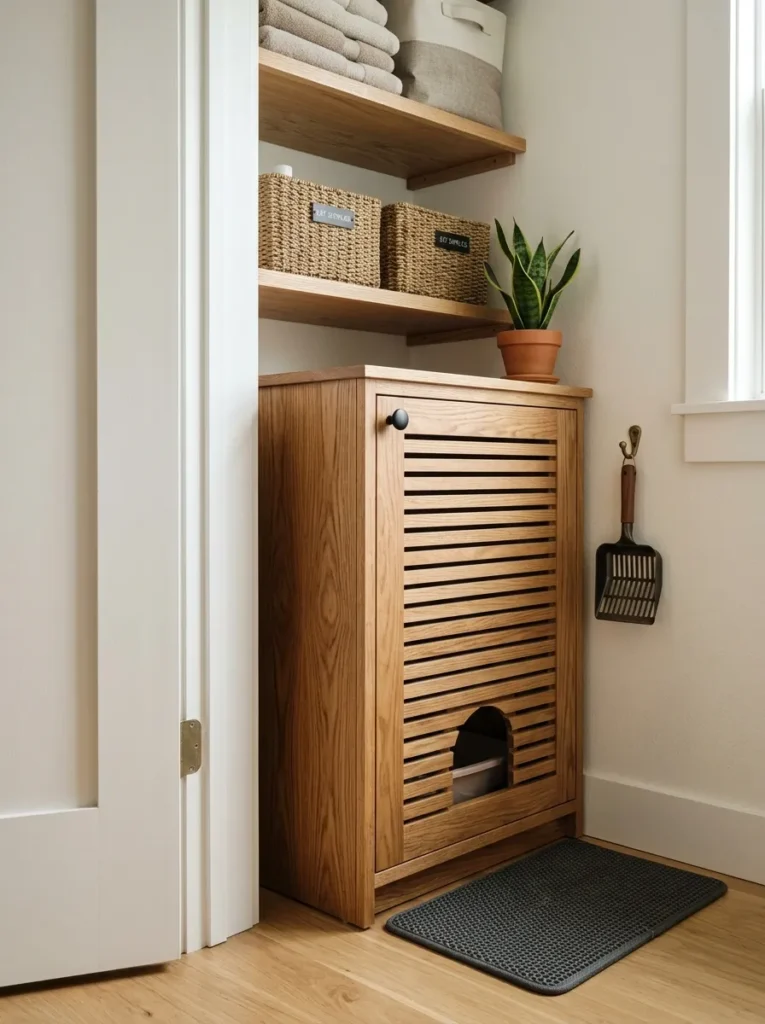
Vibe: Efficient, like an awkward closet corner became fully functional overnight.
Why it works: Building a ventilated cabinet insert around an existing litter box uses dead closet space while concealing the box from the main room, a layout principle that solves both storage and visibility in one build.
How to get it: Build a simple oak frame cabinet sized to your litter box with a cutout entry hole on one side and small ventilation slats cut into the opposite panel, positioning it in an underused closet or nook corner.
Shop the Look
| Product |
|---|
| Oak wood panel sheet |
| Matte black cabinet hinge kit |
| Ventilation slat cutting template |
| Litter scoop holder hook |
| Wood screws and cabinet hardware |
14. Small Space Braided Rope Cat Tree Wrap
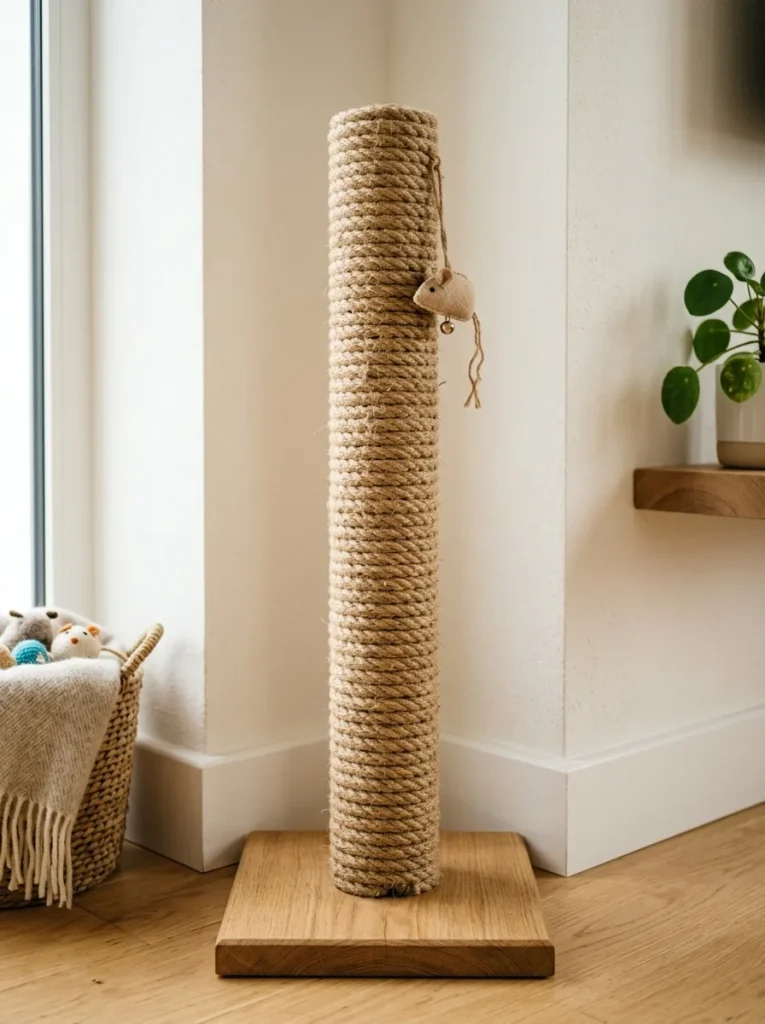
Vibe: Textural, like the corner post earned its keep twice over.
Why it works: Wrapping a slim post rather than building a wide multi-tiered cat tree uses vertical space efficiently in a tight corner, an illusion technique that provides full scratching function within a footprint most small apartments can spare.
How to get it: Wrap natural jute rope tightly and continuously around a 4-inch diameter wood post, securing the start and end with wood glue and a staple hidden beneath the final coil, mounting the post on a weighted oak base.
Quick Win: Wrapping an existing plain post you already own with fresh rope refreshes a worn scratcher without buying a whole new tree.
Shop the Look
| Product |
|---|
| Natural jute rope thick gauge |
| Wood post 4 inch diameter |
| Weighted oak base plate |
| Wood glue heavy-duty |
| Small dangling toy attachment |
How to Start Your DIY Pet Accessory Transformation
Start with a collar, not a bed. A collar uses the least material, teaches the core skills of measuring and hardware attachment that every other project builds on, and gives you a finished, usable piece within a single afternoon rather than a full weekend.
The most common mistake is using plastic clips or hardware store hooks instead of proper brass hardware rated for pet use. Cheap hardware corrodes or snaps under regular tugging, which compromises the whole project’s durability; source hardware specifically rated for pet gear weight, even if it costs a few dollars more per piece.
Three items under $50 that make an immediate difference: a strip of vegetable-tanned leather with a brass buckle kit, a bundle of natural jute rope, and a heavyweight canvas fabric remnant.
A basic version — a collar or a braided toy — is an afternoon project costing $10 to $25 in materials. A full set including a bed, collar, leash, and feeding accessories runs $80 to $200 and typically takes two to three weekends, since sewing projects like the bed cover need more precise measuring and construction time.
Frequently Asked Questions About DIY Pet Accessories
What materials are safest and most durable for DIY pet accessories?
Vegetable-tanned leather, heavyweight canvas, and natural cotton rope are all durable, non-toxic choices that hold up well to chewing, tugging, and regular washing. Solid brass hardware is the safest metal choice since it doesn’t rust or flake the way lower-quality plated metals can over time with repeated moisture exposure.
How do I measure my pet correctly for a DIY collar or bed?
For a collar, measure snugly around the base of the neck where a collar naturally sits, then add 2 to 4 inches for adjustability and buckle overlap. For a bed, measure your pet in their natural curled or stretched sleeping position and add at least 4 inches of margin on each side, since a bed that’s too snug will actually be used less.
How much does it cost to make a full set of DIY pet accessories?
A single project like a collar or a braided toy costs $10 to $25 in materials. A complete set including a bed, collar, leash, and feeding station accessories typically runs $80 to $200, with the bed and any wood-based furniture projects accounting for the largest share of that cost.
Can DIY pet accessories work well for small apartments with limited pet gear storage?
Yes — projects like the fold-flat travel bed, the wall-mounted leash hook, and the wrapped scratching post are all designed specifically to minimize footprint, either through storage efficiency or a slim vertical profile. A single wall-mounted hook and a fold-flat bed can replace what would otherwise be several bulky store-bought pieces.
What’s the best beginner project if I’ve never sewn or worked with leather before?
A braided canvas and rope tug toy is the most beginner-friendly project since it requires no sewing machine, no leather tools, and no measuring precision beyond cutting equal lengths. Once that feels comfortable, a simple leather collar with pre-punched holes is a natural next step before attempting a fully sewn bed cover.
Ready to Craft Your Own DIY Pet Accessories?
Between collars, toys, beds, and feeding stations, these 14 ideas cover a full range of ways to bring handmade care into your pet’s everyday gear. Starting with just one collar or toy is not a small project, it’s the piece that teaches the exact skills every other item on this list builds on. Today, pick up a strip of vegetable-tanned leather and a brass buckle kit, and set aside an evening to measure and cut your pet’s first handmade collar. Once it’s buckled on, the rest of the gear around your home will start to feel a little more ready for an upgrade too, one project at a time. Save your favorite ideas now — especially the ones using brass hardware, since that’s the detail that makes handmade pet gear look intentional rather than just practical.